What Google Takeout Actually Hands You
Exporting a library at Google Takeout doesn't give you a tidy photo library. It gives you an archive of how Google stores things, and most of what makes a photo library useful sits beside the pictures rather than inside them.
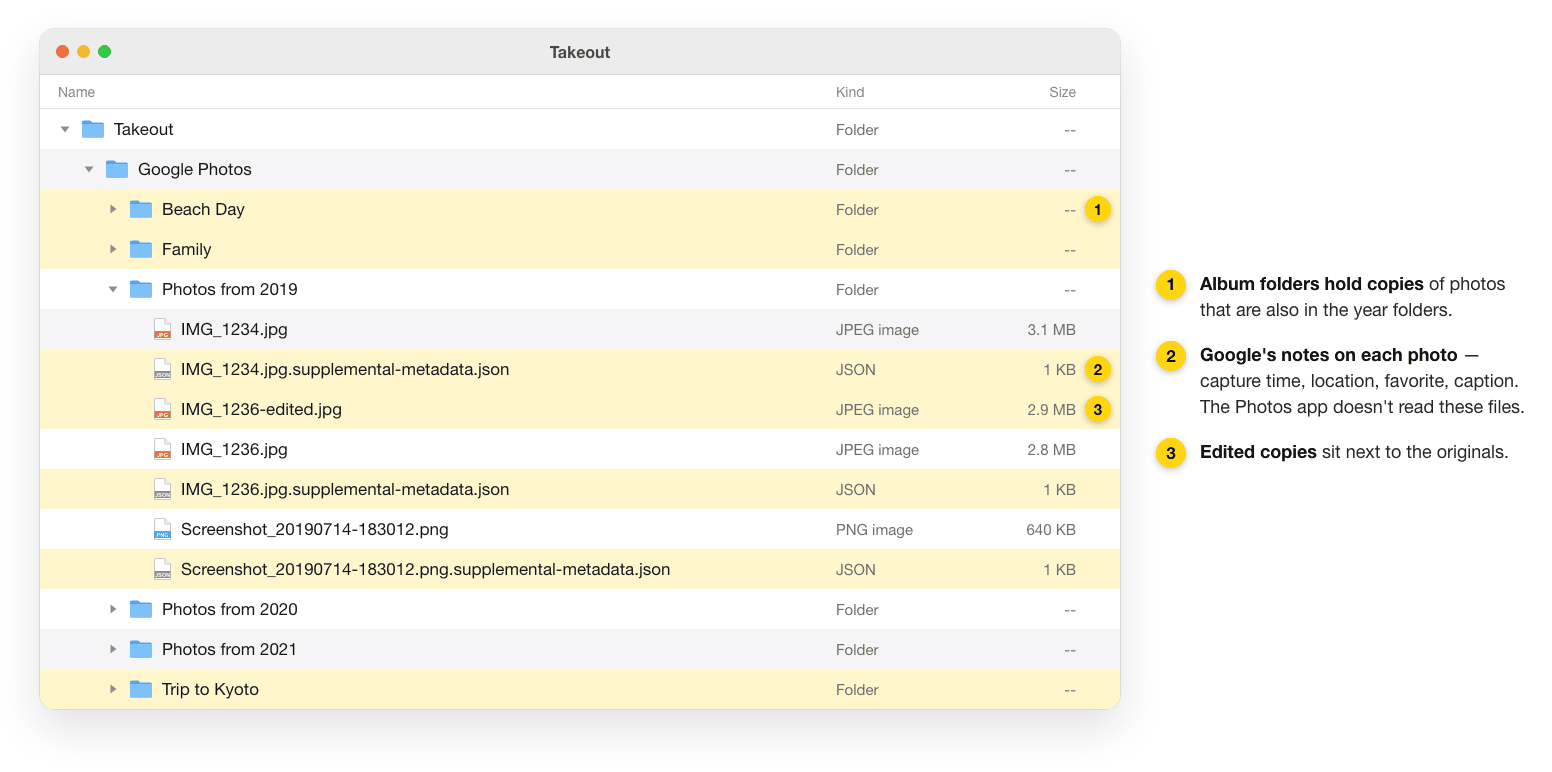
- 🗜️ Several .zip parts — A large library is split into numbered archives at the size you pick when you create the export. A photo and the file holding its details can end up in different parts.
- 🧾 A JSON file next to almost every photo — Named like
IMG_1234.jpg.supplemental-metadata.json(older exports useIMG_1234.jpg.json), it records the capture time Google shows, the location, whether it's a favorite, and the caption. Dates and places you changed inside Google Photos are kept there. - 📁 Year folders plus album folders —
Photos from 2019-style folders hold everything, and every album is another folder containing copies of the same files. The folder names follow the language of your Google account. - ✏️ Edited copies — Photos you edited in Google Photos often come out twice: the original and an
-editedversion.
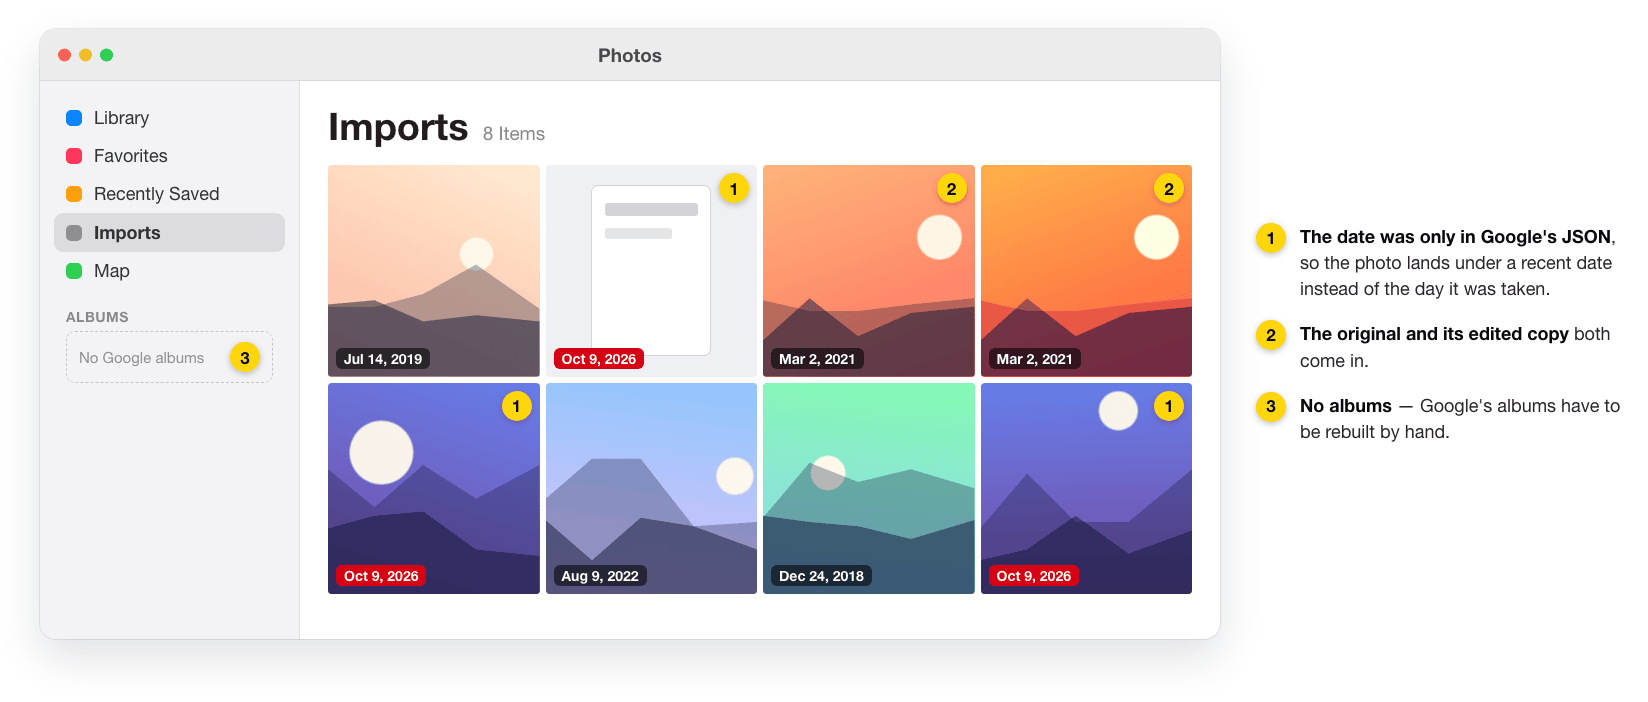
Point the Photos app at that folder and it reads only the image files. The JSON is ignored, so a picture whose date lives only in Google's metadata lands under a recent date instead of the day it was taken, album folders bring in second copies, and nothing rebuilds your albums. That gap is what this guide is about.
Three Routes Out of Google Photos, Side by Side
Google and Apple run an official transfer, and for many people it's the right answer. The table shows where it fits and where working from a Takeout export does better.
| Google → iCloud direct transfer | Takeout + Photos import by hand | Takeout + OurClone | |
|---|---|---|---|
| Needs a Mac | No | Yes | Yes (macOS) |
| Download the export first | No — Google sends it to Apple | Yes, then unzip every part | Yes, as .zip; nothing is unzipped |
| Advanced Data Protection on | Not available | Not affected | Not affected — it imports through the Photos app |
| Live Photos | Not transferred | Left to you | Rejoined when both halves are in the export |
| Your Google albums | Photos arrive in an "Import from Google" album; Apple doesn't mention recreating yours | Rebuilt by hand | Recreated in Photos |
| Dates kept only in Google's JSON | Sent along with the photo's metadata | Ignored | Read from the JSON |
| Captions | Included | Not imported | Not imported |
| RAW files | Put in iCloud Drive, not Photos | Imported | Imported (common camera RAW formats) |
| Running it again | Doesn't add duplicates | Photos can skip items it already has | Skips everything imported before |
The direct transfer is the easy choice if you don't use Advanced Data Protection, don't care about Live Photos, and are fine with the pictures arriving in an "Import from Google" album. If you want your albums back, use Advanced Data Protection, or shoot on an iPhone and want Live Photos to stay live, the Takeout routes are the ones to read.
Method 1: Google's Direct Transfer to iCloud Photos
Google sends a copy straight to Apple. Nothing passes through your computer, and your Google Photos library stays where it is. The steps below follow Apple's support article.
- 🌐 Start a Google Photos export — Go to takeout.google.com and follow the steps to export Google Photos.
- 🍎 Choose “Apple - iCloud Photos” as the destination — Sign in to your Apple Account when asked, then tap Allow so Google can add photos and videos to iCloud.
- ⏳ Wait — Apple says it takes from several hours to a few days. The pictures appear in an album called "Import from Google" with the transfer date; files that can't go into Photos, such as RAW images, land in an "Import from Google" folder in iCloud Drive.
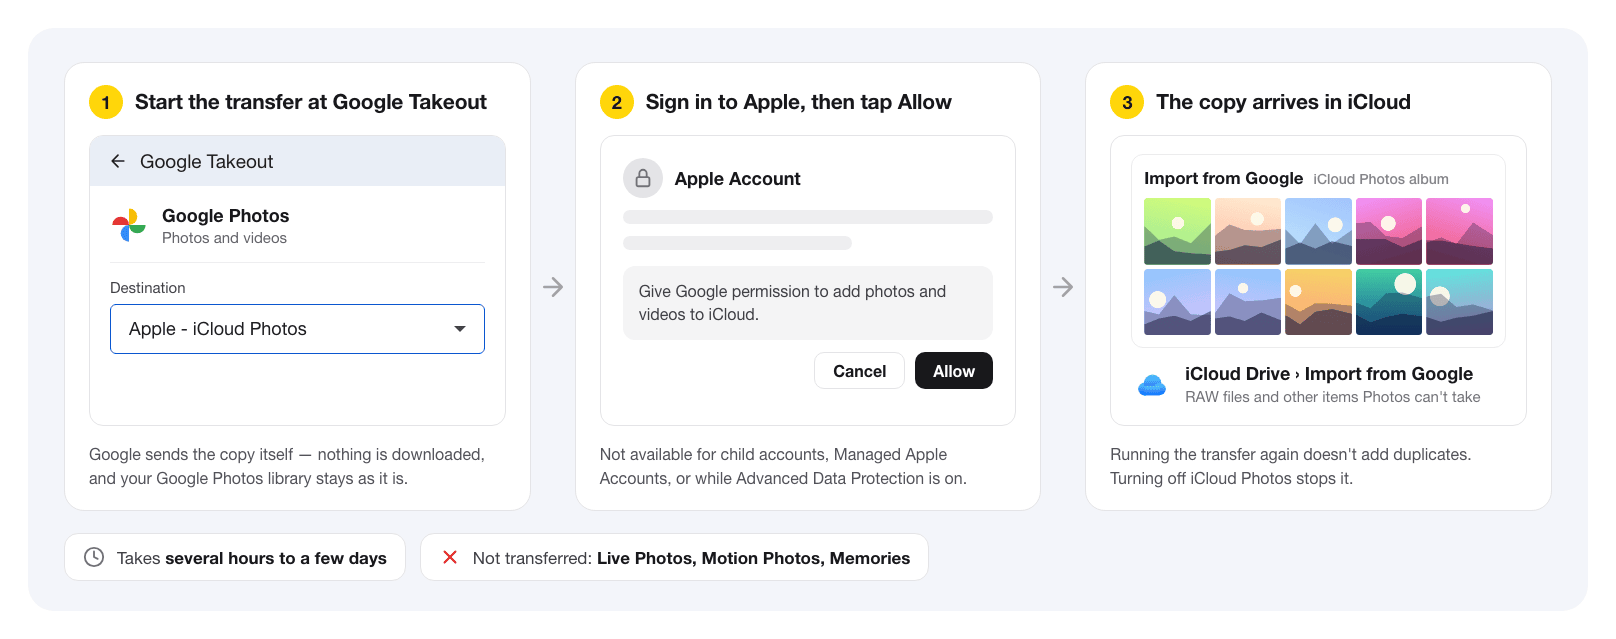
A diagram of the steps in Apple's support article — Google's and Apple's actual screens look different.
Know the limits before you start: it isn't available for child accounts or Managed Apple Accounts, it can't import while Advanced Data Protection is on, Motion Photos, Live Photos and Memories aren't transferred, and turning off iCloud Photos during the transfer stops it. If you run out of iCloud storage, add space and request the transfer again — it won't duplicate what already arrived.
Method 2: Import a Takeout Export into Photos by Hand
Workable for a small library, and a good way to see why the metadata problem exists.
- 📦 Export and download — At Takeout, deselect everything, tick Google Photos, choose
.zip, create the export, and download every part Google emails you. - 🗂️ Unzip everything into one folder — Every part has to be unpacked; a photo's JSON may sit in a different part than the photo.
- 📂 Import the year folders — In Photos choose File → Import…, select the
Photos from …folders (not the album folders, which hold copies), click Review for Import, then Import All New Photos.
What you get is the files without Google's notes about them: anything whose date was only in the JSON lands under a recent date instead of the day it was taken, edited copies come in next to their originals, and albums have to be rebuilt by hand. The unzipped copy also needs as much free disk space again as the export itself.
Method 3: Import the Takeout Export with OurClone
OurClone reads the .zip parts where they are — nothing is extracted — matches every photo with its JSON across all parts, and imports straight into the Photos app on your Mac. You need a Mac and OurClone v1.5.0 or later (Apple Silicon and Intel builds are on the download page).
Watch the whole Takeout-to-Photos import on YouTube (2 minutes).
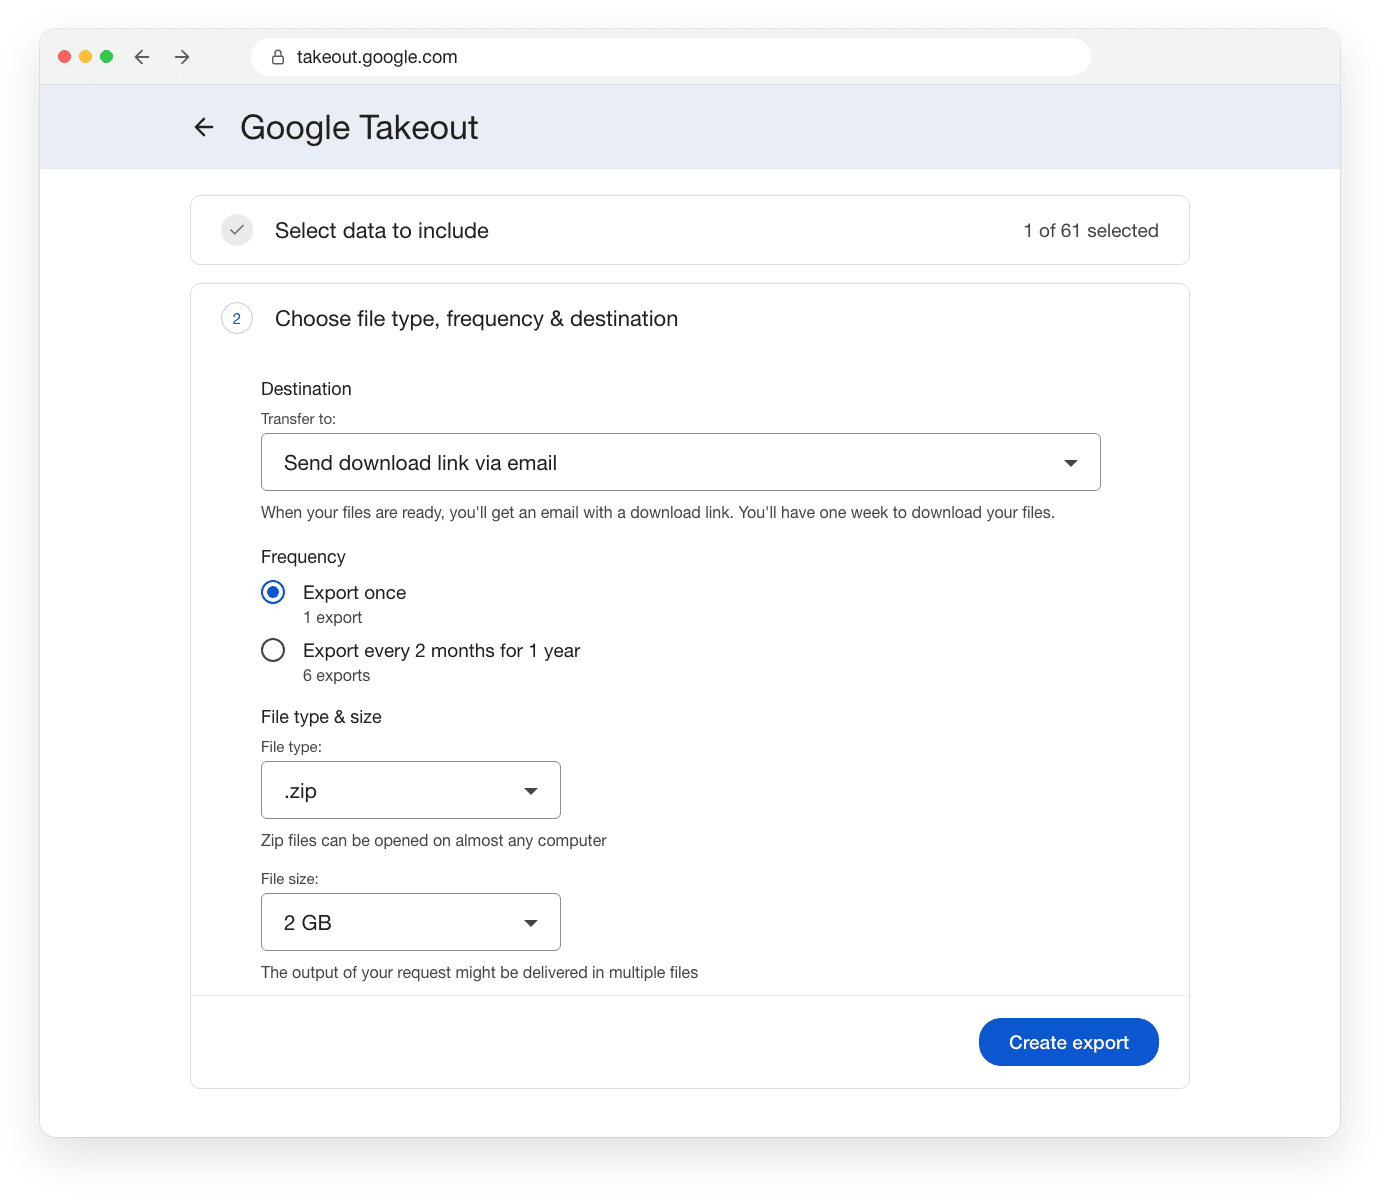
- 📦 Step 1: Export Google Photos as .zip — At takeout.google.com, click Deselect all, tick Google Photos, and on the next screen set the file type to
.zip— OurClone can't read the.tgzoption. Keep Send download link via email and Export once, then click Create export. Google prepares it in the background — that can take hours or days — and the emailed links stay valid for a week. Download every part into one folder you won't move: OurClone reads the archives from that location. - 🗂️ Step 2: Add the Export as a Storage — In OurClone open the
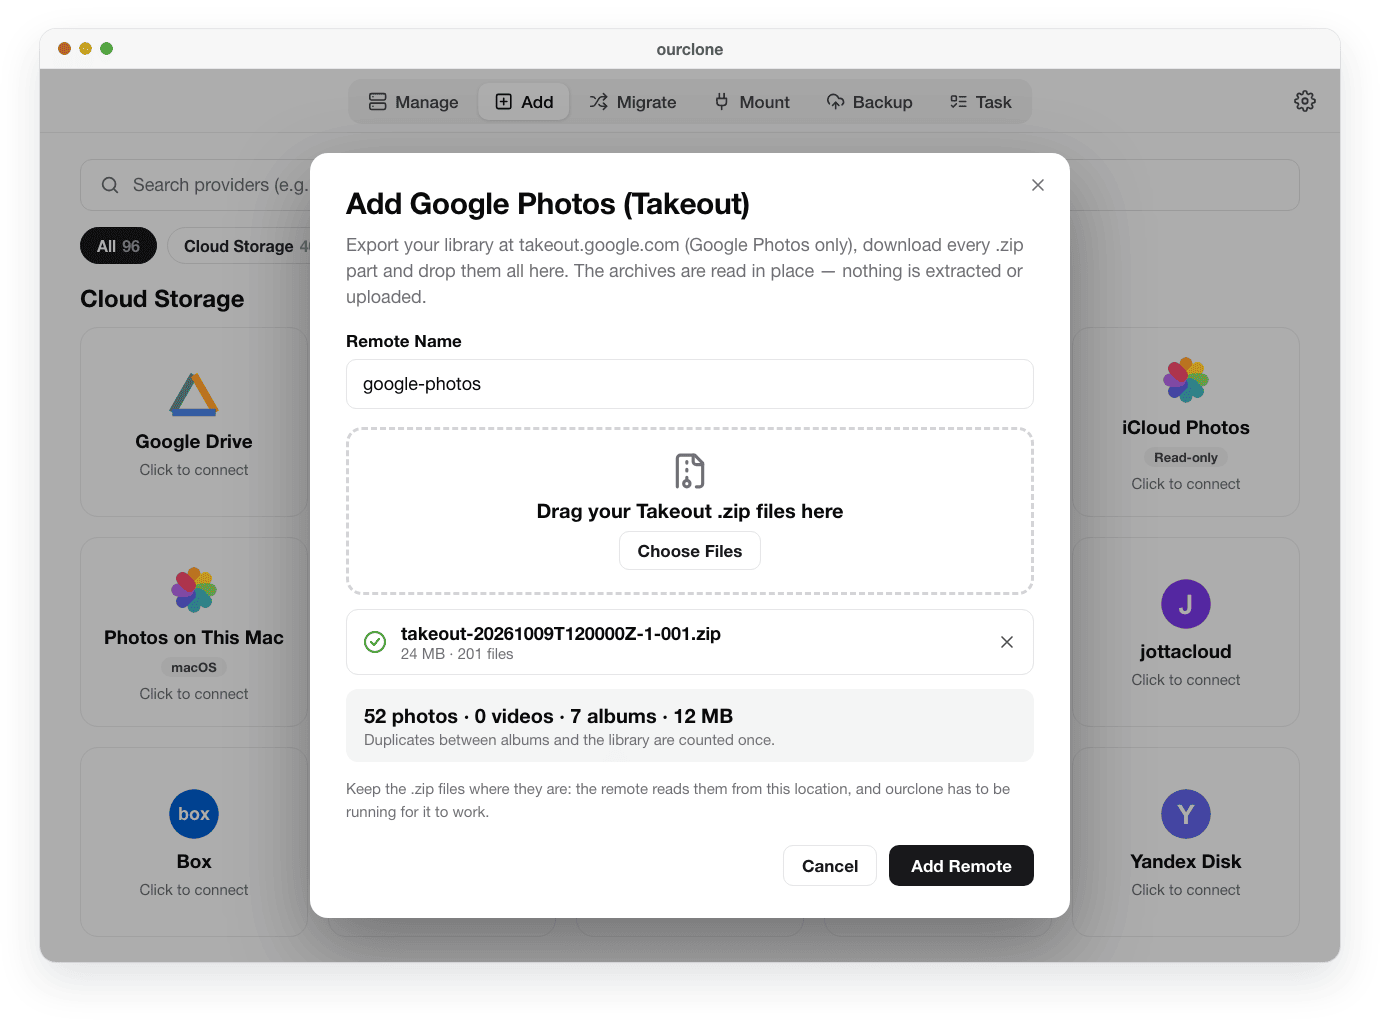
Addtab and pick Google Photos (Takeout). Drag all the .zip parts into the dialog (or click Choose Files). Before anything is added, OurClone checks the archives: it flags files that are unreadable or still downloading, warns if a numbered part is missing, and shows how many photos, videos and albums the export holds — duplicates between albums and the library counted once — plus how many items have no date from Google. Click Add Remote. You can add more parts later from the remote's Archives button in Manage. - 📸 Step 3: Connect Photos on This Mac — Back in the
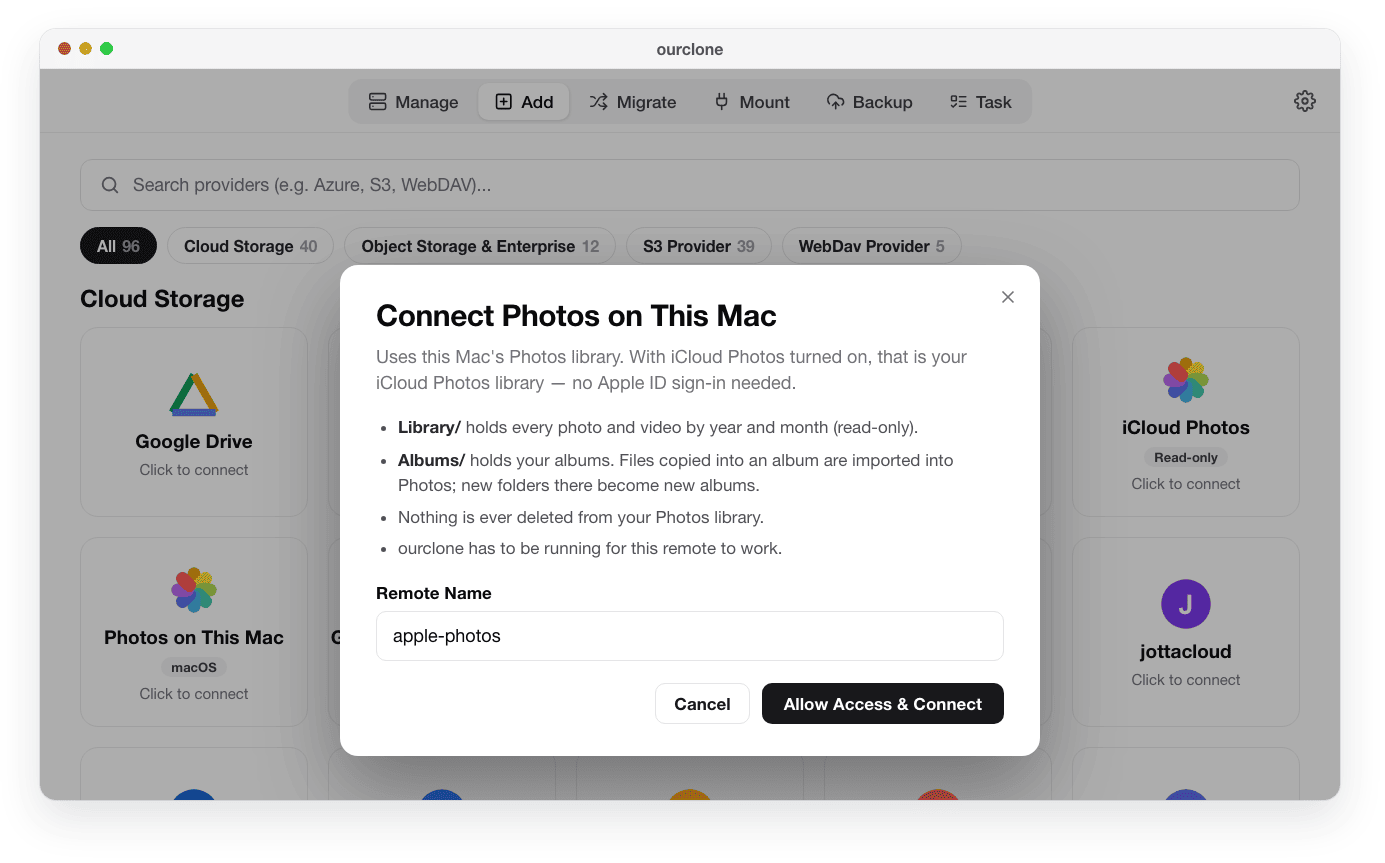
Addtab, choose Photos on This Mac and click Allow Access & Connect, then allow access in the macOS prompt. No Apple ID is entered in OurClone; it uses the library of the Mac you're on. This guide covers that connection in more detail. - 🎛️ Step 4: Pick the Export as Source and Photos as Destination — Open the
Migratetab. As the source, choose the Google Photos (Takeout) remote — its top level for everything, a year underLibrary, or a single album underAlbums. As the destination, choose Photos on This Mac; any folder works, and if you pick an album — you can create a new one underAlbumsright in the picker — every imported photo is added to it as well. Keep Copy selected — the export is read-only, so Move isn't offered, and Sync is never available with Photos as the destination. Click Start Transfer. - 📈 Step 5: Watch It Import, Then Open Photos — The
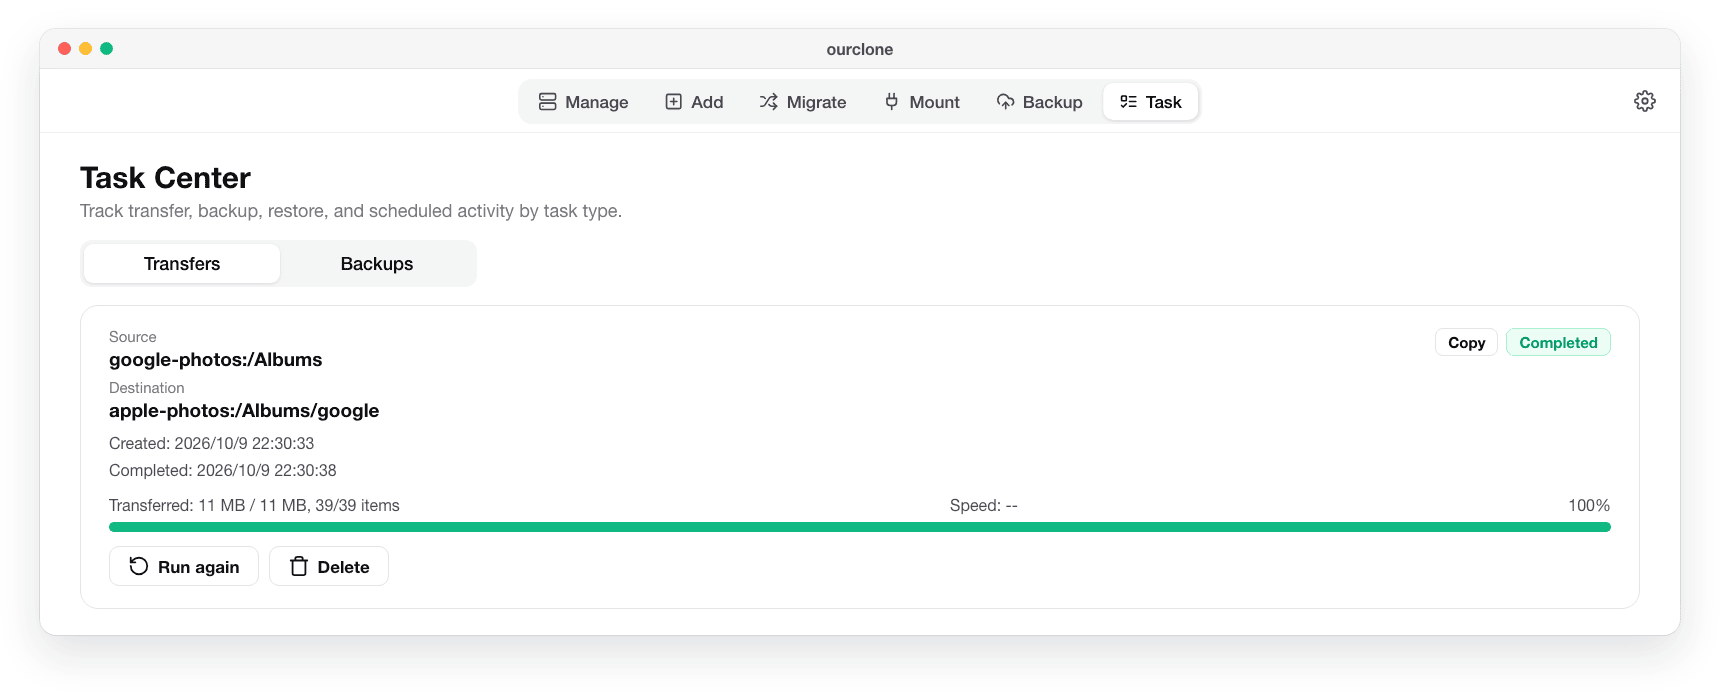
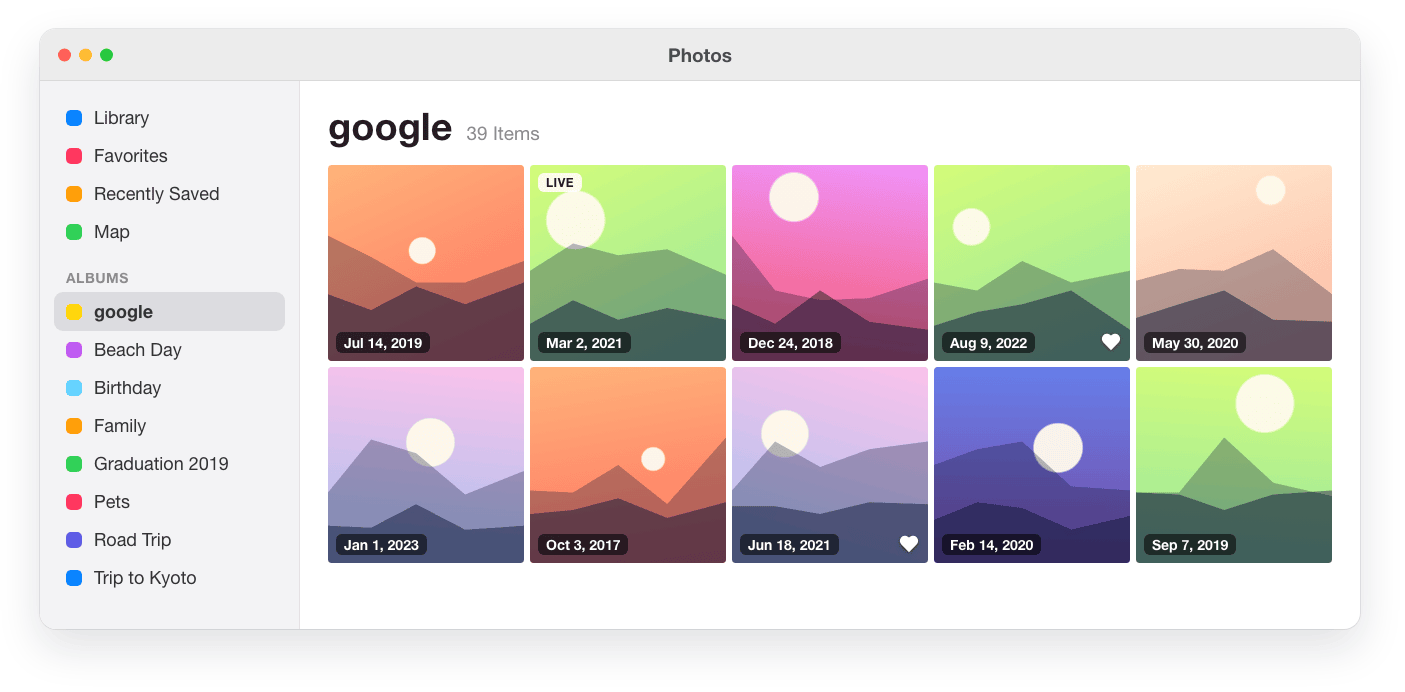
Taskpanel shows the progress and item count until the task reads Completed, and lists any file that couldn't be imported. Each photo goes in with the capture date, location and favorite flag from Google's JSON; Live Photo halves are joined back together; your Google albums appear under My Albums. Formats the Photos app won't take — AVI, MKV, WMV, MTS, M2TS, MPG, WebM and FLV videos — are listed as skipped rather than failed. Keep OurClone running until the task finishes.
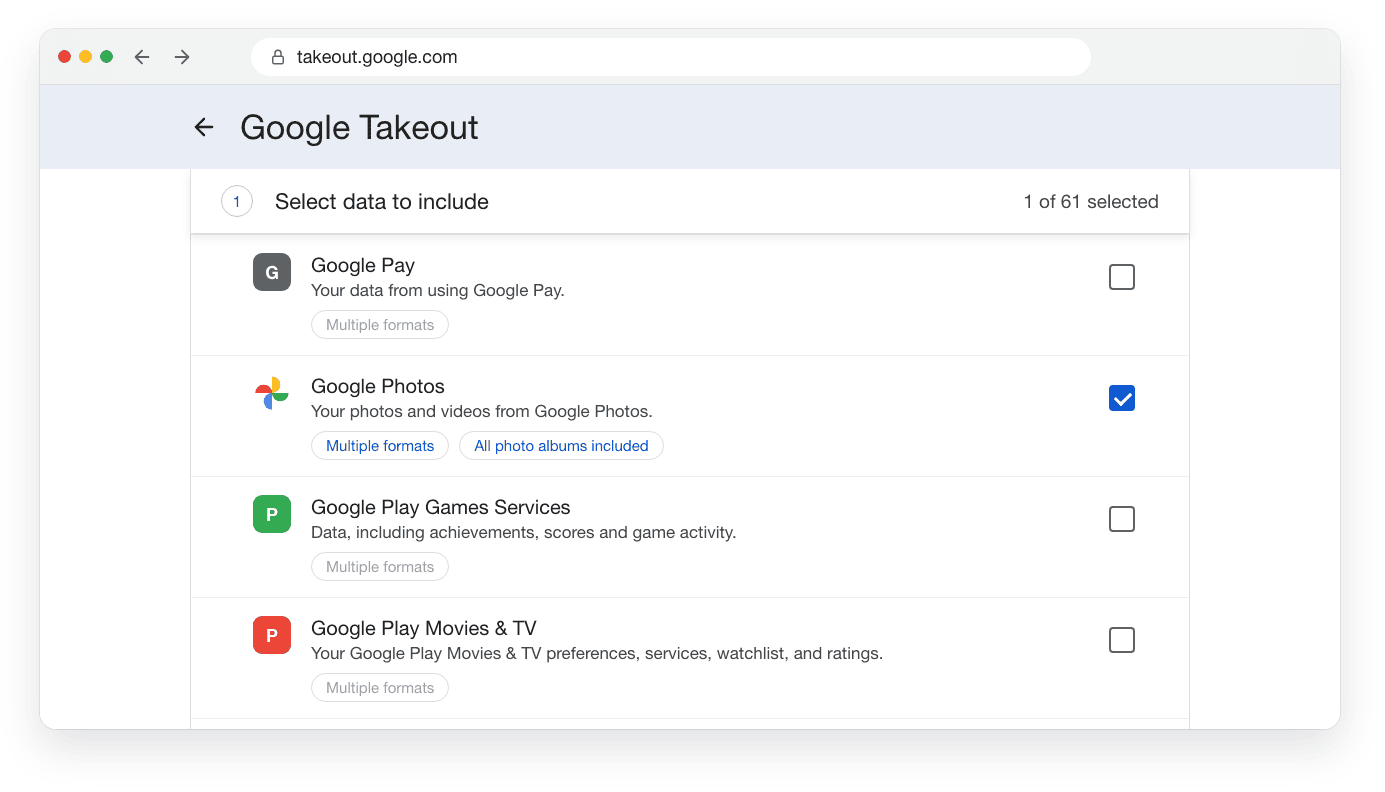
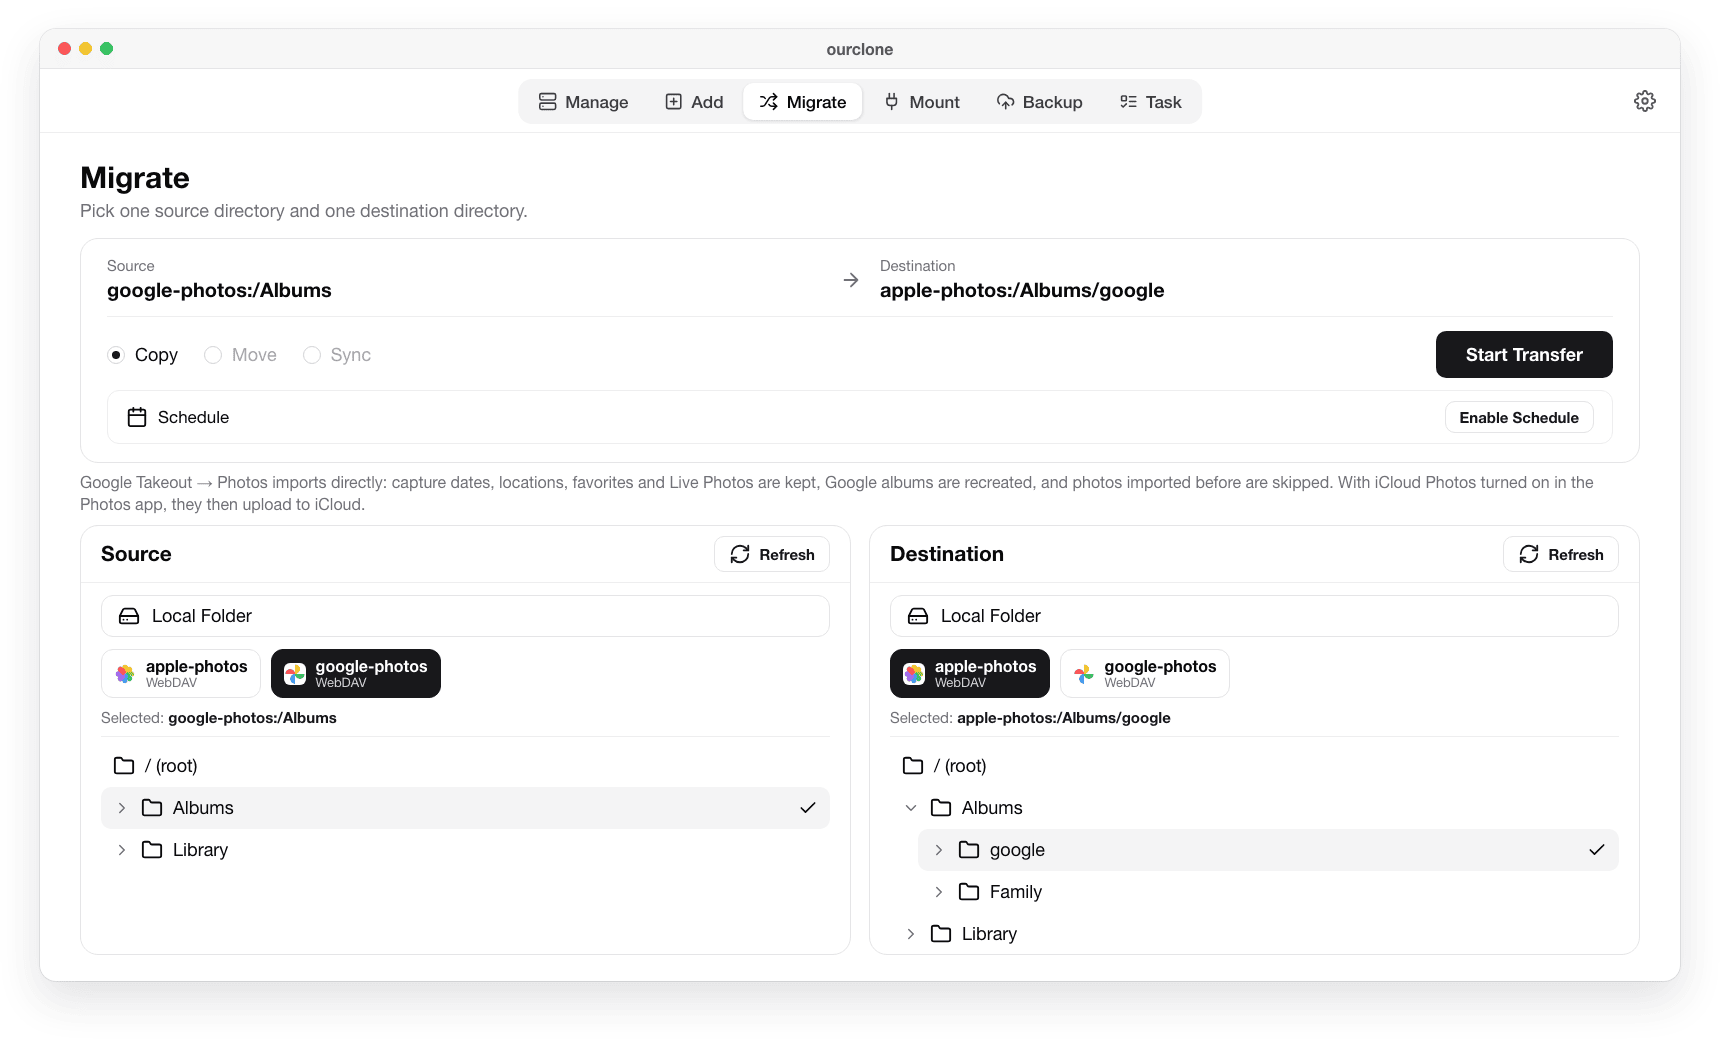
Here the source is the export's Albums folder and the destination a new album called "google". Choose the export's top level instead to include photos that aren't in any album.
Start with one album as the source to see how it lands, then run the whole export. Running it again — or adding more parts later — skips everything already imported. With iCloud Photos turned on in the Photos app, macOS uploads the new pictures to iCloud on its own schedule; OurClone's job ends once they're in the library, so make sure your iCloud plan has room for them.
Not Moving to Apple? Copy the Export Anywhere with Its Dates
The same Google Photos (Takeout) remote is useful beyond Apple, and this part works on Windows as well as macOS. Browsing it shows one clean library — Library/<year> plus Albums/<album> — with the JSON files hidden and each photo listed once even when it sits in several albums. Copy it to Proton Drive, pCloud, a NAS or a local folder and every file arrives with its modification time set to the capture time from Google's JSON, which is what most photo apps and cloud timelines sort by.
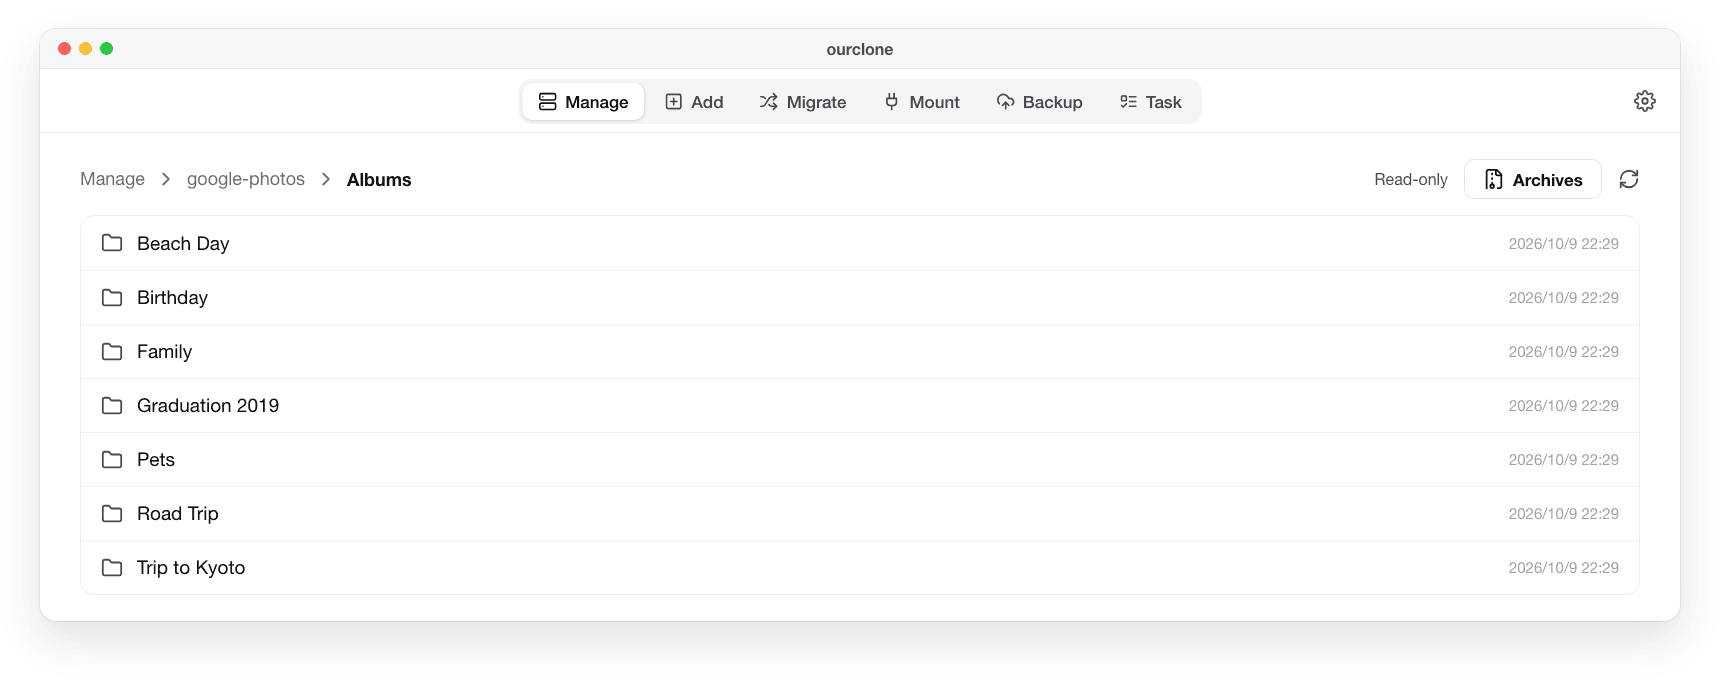
Two things to know: the photo files themselves are copied exactly as they are in the export, so their embedded EXIF isn't rewritten, and only Copy or Sync are available from it since the export is read-only.
When the Import Doesn't Look Right
- 🧩 "Part of the export seems to be missing" — The parts are numbered, and a photo's date can sit in a different part than the photo. Download the missing part and add it from the remote's Archives button; the next run imports only what's new.
- 📦 You exported as .tgz — OurClone reads only .zip archives, and the Add dialog points this out. Create the export again with
.zipas the file type. - 🗓️ Some items have no date from Google — The check counts them before you add the export. They're filed by Google's year folder, and their file date falls back to the export time.
- 🎞️ Some videos didn't import — The Photos app accepts MOV, MP4, M4V and 3GP; other formats are listed as skipped. They're still in the export, and you can copy them to another cloud or a folder instead.
- ✏️ Where did my edited versions go? — When the original is part of the import, Google's
-editedcopy is skipped so you don't get both. - 💬 Captions are missing — Google's captions (descriptions) aren't imported into Photos.
Quick Answers
Does OurClone sign in to my Google account?
No. It reads the .zip files you downloaded, and nothing in your Google Photos account is changed or deleted.
Does OurClone upload to iCloud itself?
No. It imports into the Photos library on your Mac. With iCloud Photos turned on, macOS uploads those pictures to iCloud.
Why not use rclone or the Google Photos API?
Since March 31, 2025, Google's API only lets an app like rclone download photos that the app uploaded itself, and even then not at original resolution, with location removed and videos compressed. The same limits apply to OurClone's own Google Photos connection. A Takeout export is the complete copy.
Can I do this on Windows?
You can add the export, browse it and copy it to another cloud or a folder on Windows. Importing into the Photos app needs a Mac.
Do the .zip files have to stay where they are?
Yes, while you're using them. OurClone reads them in place, so moving or deleting them breaks the remote. Once the import is done and you've checked the result, you can archive or delete them.