Why Mounting WebDAV on macOS Is a Smart Move
If you run an Apache, Nginx, or appliance-based WebDAV server, you already have remote storage you control. Mounting it on macOS means those files appear in Finder and stream on demand — no separate client syncing everything to disk.
- 🗂️ Native Finder Access -- Your WebDAV files behave like a normal macOS volume across every app.
- 💾 No Full Sync Required -- Stream only what you open instead of mirroring the entire server locally.
- 🔁 Live Two-Way Access -- Edits push back to the server; remote changes appear after the next poll.
- 🛡️ Read-Only Safety -- Browse a shared WebDAV share without risking accidental edits.
- 🔌 Works With Any WebDAV Backend -- The same flow fits self-hosted servers and WebDAV-capable services alike.
How Mounting a Cloud Drive Works (and Why It's Different from Sync)
Sync copies every file down to your Mac and keeps both sides matched. A mount leaves files on the WebDAV server and streams them to your Mac only when you open them.
OurClone manages reads, writes, and change detection through a local cache, keeping recently used files quick while the rest stay on the server until requested.
You can mount a WebDAV server with a configurable polling interval and cache, plus a read-only option for safe browsing.
- 🚀 Stream files on demand — no need to download the whole server
- 💾 Saves Mac disk space by caching only what you actually open
- 🔁 Two-way sync — edits in the mounted folder push back to the WebDAV server
- 🛡️ Read-only mode prevents accidental writes when you only need to browse
What to Know Before You Mount WebDAV
A quick checklist before you mount.
- 🧩 Install macFUSE First -- OurClone's macOS mount relies on macFUSE; install it once before your first WebDAV mount.
- 📁 Pick the Right Mount Source -- Mount a single directory for focused access, or the server root for full Finder browsing.
- 🖥️ Choose a Sensible Mount Point -- Use a dedicated empty folder like
~/CloudMounts/WebDAV, not your Desktop or a folder with existing files. - 🔒 Read-Only vs Read-Write -- Read-only suits browsing; read-write is needed to upload, edit, or delete. Read-only mounts cannot upload.
- ⏱️ Set a Reasonable Polling Interval -- Shorter spots changes faster but makes more requests; longer is quieter on the network.
- 💽 Plan Your Cache Size -- A larger cache speeds repeat access at the cost of local disk; size it to the files you use most.
How to Mount WebDAV on macOS with OurClone
OurClone connects over WebDAV, then mounts the server as a local volume. Here's the flow.
- 🔗 Add Your WebDAV Server -- Open OurClone and go to
Add Storage. Select WebDAV. Enter the WebDAV URL, your username, and password (use an app password if your server requires one). Once connected, the server appears in your storage list. - 📂 Open the Mount Tab and Click New Mount -- With the server connected, go to the
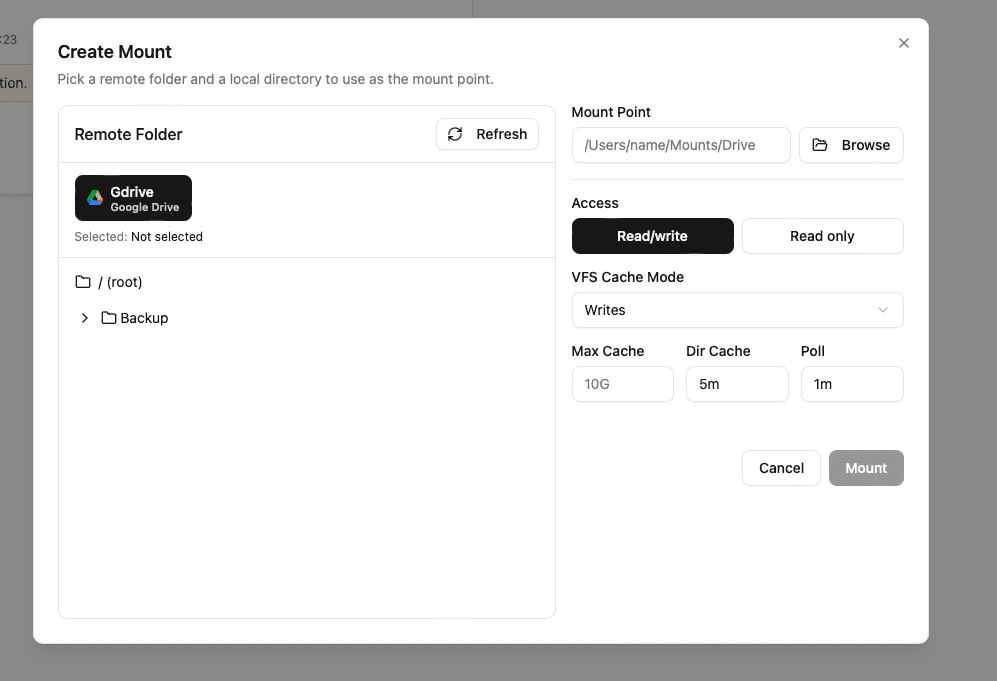
Mounttab and click New Mount in the top-right corner to open the configuration dialog. - ⚙️ Configure the Mount Settings -- Pick your WebDAV connection as the source. Choose a specific folder or the whole server, then a local mount point like
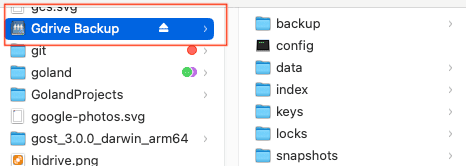
~/CloudMounts/WebDAV. Select Read-only or Read-write, optionally adjust polling interval and max cache size, and click Mount. - 🗂️ Use Your WebDAV Mount Like a Local Folder -- Open the mount point in Finder. It behaves as a mounted volume — browse, open, create folders, drag in files, and delete items. Add a
backupfolder and a few files; OurClone streams them to the WebDAV server in the background. - ✅ Confirm the Sync on WebDAV -- Back in OurClone, open the WebDAV storage in the file browser to see the new
backupfolder. If your server has a web interface, log in there to confirm the files appeared too.


A standard WebDAV connection plus OurClone's mount engine gives you a remote drive that feels native on macOS.
Getting the Most Out of Your WebDAV Mount
Keep these in mind once your WebDAV mount is live.
- 🔁 Edits Sync Both Ways -- Adds, renames, and deletes in the mount propagate to the server; remote changes show after the next poll.
- 🛑 Read-Only Means Read-Only -- A read-only mount blocks uploads and saves. Remount read-write to make changes.
- 💽 Cache Lives on Your Mac -- Recently used files are cached locally; lower the max cache size if disk space runs short.
- ⏱️ Polling Interval Affects Freshness -- For most WebDAV servers, a 30–60 second interval balances freshness and request load.
- 🔌 Unmount Cleanly Before Sleep -- OurClone reconnects on wake; for long breaks, click Unmount to release the volume.
When Your Mount Stops Working
WebDAV mounts typically fail when a password or app password changes, a TLS certificate expires, the server URL moves, the network drops, or the mount point is no longer empty. Re-check the URL and credentials, then remount.
Verify the Sync Anytime
When in doubt, open the WebDAV storage view inside OurClone, or sign in to your server's web interface directly to confirm your files.