If you’ve been using Google Drive for years but want an additional copy of your files in a European-based cloud with strong privacy guarantees, Jottacloud is one of the best destinations. In this guide, I’ll share how I personally synced my Google Drive folders to Jottacloud using OurClone — a lightweight local sync tool that keeps everything under your control.
Quick takeaway: The whole process takes less than 15 minutes — you’ll install OurClone, connect Google Drive via OAuth, and then generate a Personal Token inside your Jottacloud account to link it in.
🌍 Why Choose Jottacloud?
Jottacloud is based in Norway, which means your data falls under strict GDPR laws. For those who feel uneasy about U.S.-based cloud storage policies, this is a solid alternative. On top of that, Jottacloud integrates well with desktop and mobile apps, making it a good long-term backup partner.
⚙️ Step-by-Step Setup
1. Install OurClone
Download it for Windows, macOS, or Linux. The installation is straightforward, just like installing Dropbox or Google Drive clients.
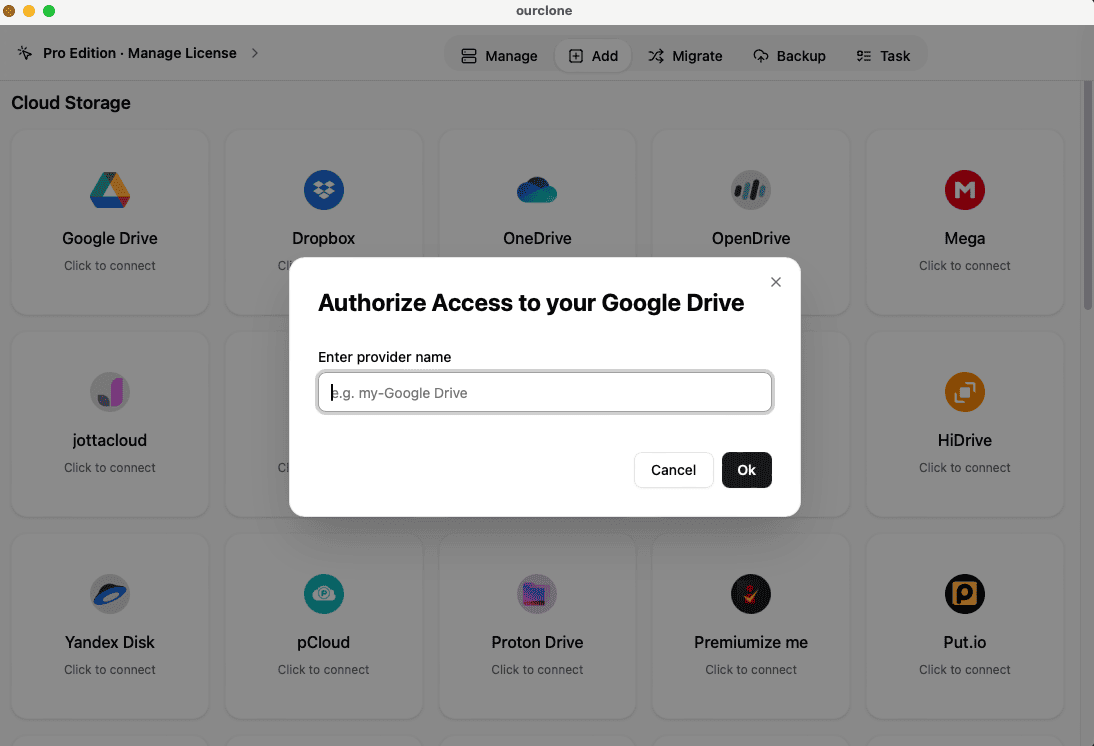
2. Connect Google Drive
Inside OurClone, click Add Cloud → Google Drive. You’ll be redirected to Google’s login screen — allow access, and you’re done.
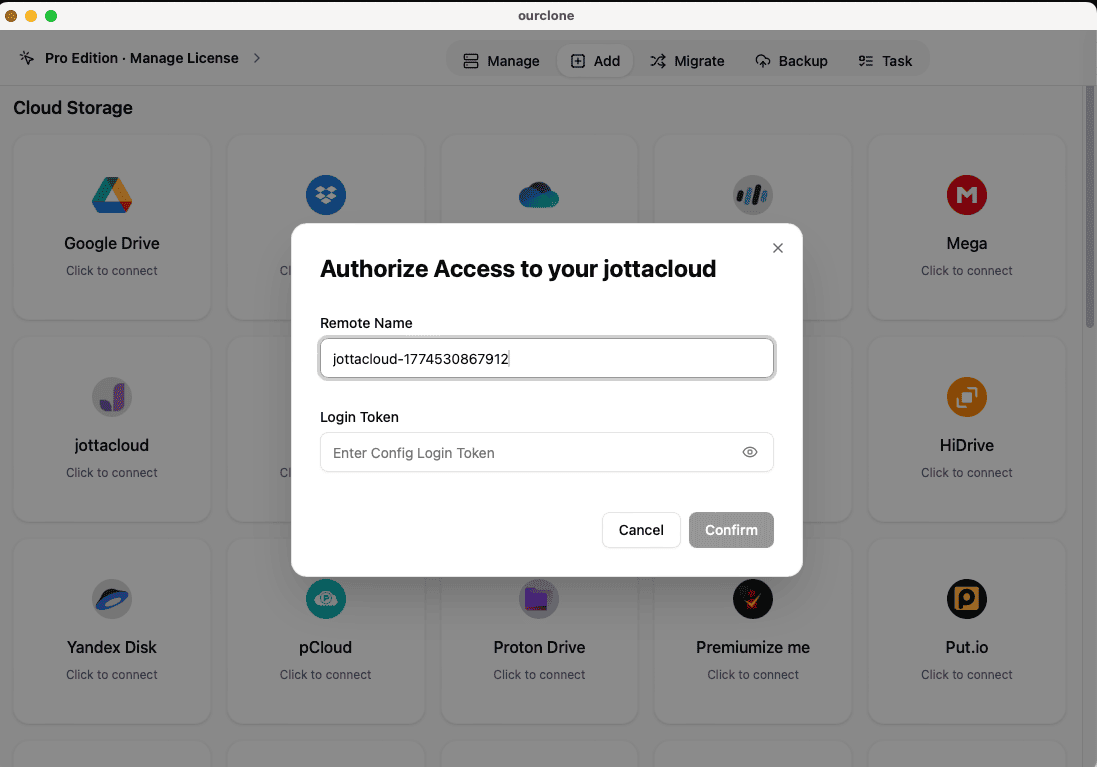
3. Connect Jottacloud (Token Required)
This step is slightly different. Jottacloud doesn’t use OAuth like Google. Instead, you need a personal access token:
- Log into Jottacloud
- Go to Settings → Security
- Click Personal Token, confirm with your password, and generate one
- Copy the token, then paste it into OurClone when adding Jottacloud
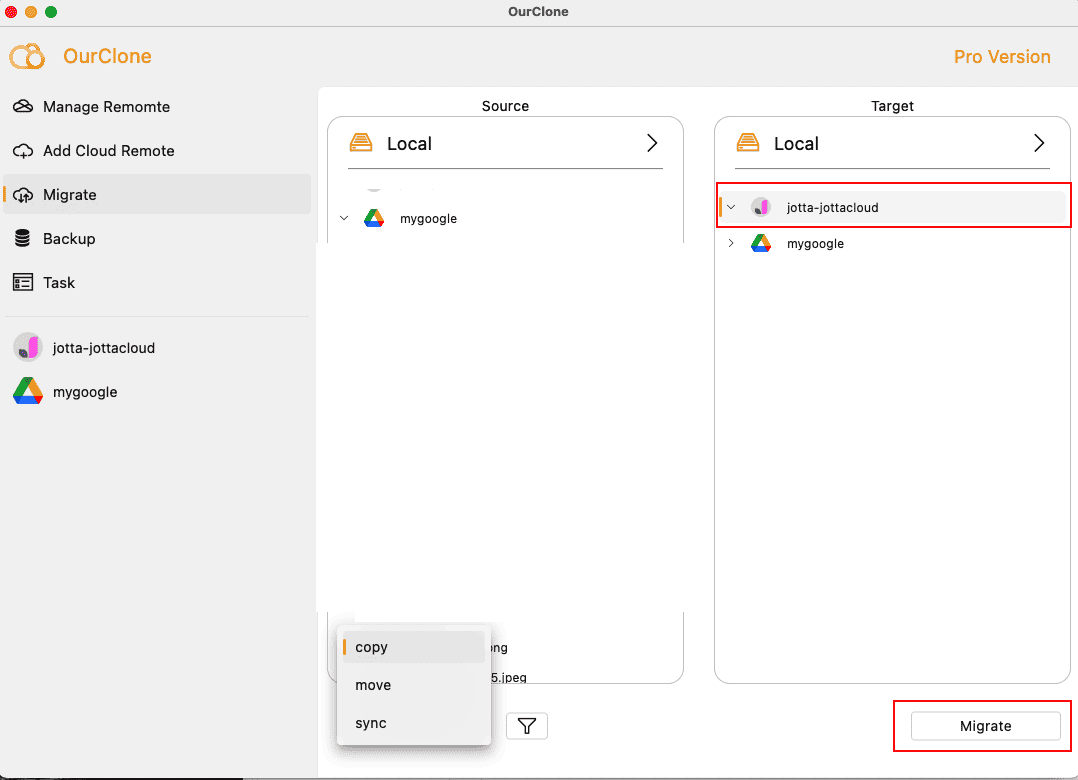
4. Set Up the Sync
Now, open Migrate in OurClone’s sidebar. Choose Google Drive as the source and Jottacloud as the destination. Select your preferred mode:
Copy→ Google Drive → Jottacloud (safe backup)Sync→ Keeps both sides identicalMove→ Transfers then deletes from source
Click Start, and let it run. Progress and logs are visible in real-time.
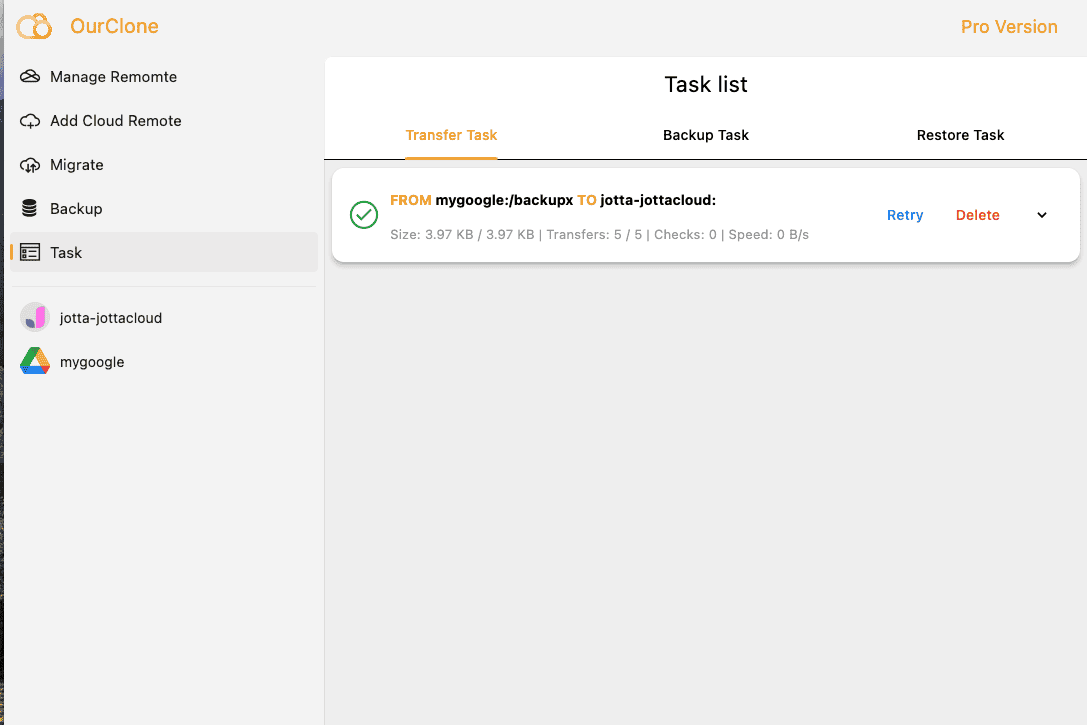
5. Monitor the Task
After starting the sync, click on Task in the sidebar to open the task list. Here you can see the current job’s progress, speed, and logs in real time. If any errors occur, they’ll also be displayed so you can take action immediately.
✅ What To Do After the Sync
Once your initial sync has completed, it’s important not to simply “set and forget.” Jottacloud uses Personal Tokens to allow third-party tools like OurClone to connect to your account. These tokens can expire over time or be revoked if you reset your password or make security changes. If your sync suddenly fails or OurClone shows an authorization error, you’ll need to return to your Jottacloud Settings → Security page, generate a new token, and re-add Jottacloud in OurClone.
In addition, here are some best practices after your first sync:
- Double-check that essential folders are intact (Documents, Photos, Projects, etc.)
- Create a logical folder structure in Jottacloud so files are easier to browse
- Enable two-factor authentication for stronger account security
- Set a recurring sync in OurClone for weekly or monthly backups
- Monitor your Jottacloud storage quota to avoid interruptions
- Keep track of your Personal Token’s validity — reissue it if syncs stop unexpectedly
⚠️ Common Issues & Fixes
Jottacloud tokens are not permanent. If your sync fails with an authentication error, log into Jottacloud → Settings → Security → Personal Token, generate a new token, and update it inside OurClone.
Check your Jottacloud plan’s available space before running a large sync. Consider upgrading if you often hit the storage cap.
Large transfers may fail if your connection drops. Use the resume/retry option in OurClone to continue without starting over.
Some files with identical names can be skipped or duplicated. Adjust sync rules to handle naming conflicts before re-running the task.
If syncing during peak hours, speeds may drop. Schedule the task overnight or during off-peak times for better performance.
🚀 Ready to try it?
Download OurClone for free today: https://www.ourclone.app/download