Why Sync Your macOS Folders to Google Drive?
Storing your files on Google Drive adds an extra layer of protection, allowing access across devices and safeguarding against data loss. Whether it's personal documents, creative projects, or work files, syncing ensures that your latest versions are always backed up and ready.
- ☁️ Anywhere Access – Open your files from your Mac, phone, or browser, no matter where you are.
- 🔄 Automatic Backup – Keep your files up to date in the cloud without manual uploads.
- 📱 Cross-Platform Convenience – View and edit documents from iOS, Android, or any computer.
- 🛡️ Google's Security Infrastructure – Benefit from Google's robust cloud security and redundancy.
- 📂 Large File Support – Store high-resolution media, large folders, and collaborative files with ease.
Choosing the Right Sync Method on macOS
There are multiple ways to sync local folders to Google Drive, each suited for different technical levels and workflows. Here's a breakdown of three practical methods:
- 🧰 Google Drive for Desktop – Install the official Google Drive app, log in with your account, and select which folders to sync. Changes are reflected in both directions automatically.
- 🔧 Rclone – A powerful command-line tool for advanced users. After configuring Google Drive with Rclone’s OAuth flow, you can script sync operations with full control, including one-way or mirror sync.
- 🚀 OurClone – A user-friendly alternative that works entirely in the cloud. Authorize your Google Drive account via OAuth 2.0, then schedule or trigger folder syncs without consuming local bandwidth.
Preparing Your Mac for Synchronization
Before syncing, it's important to organize your setup and confirm that you're ready for continuous, safe transfers:
-
🗂️ Organize Your Folder Structure – Keep important
folders like
Documents,Desktop, andPhotosclean and ready for backup. - 📡 Stable Internet Connection – For smooth uploading, ensure consistent connectivity, especially if syncing large video or archive files.
- 🔐 Use Strong Google Account Security – Enable two-step verification and avoid public computers during setup.
- 📊 Check Your Google Drive Quota – Google Drive offers 15GB free, and more if you're on a Google One plan. Syncing large folders may require additional space.
- 🔍 Test with a Sample Folder – Try syncing a small folder first to confirm everything works as expected before committing your full data set.
Verifying the Sync
Once your sync method is in place, it’s essential to ensure your data is actually backed up and matches your expectations:
- ✅ File Count Match – Check the number of files and folders on Google Drive matches your source.
- 🕓 Timestamp Accuracy – Make sure modification dates are preserved correctly after sync, especially for creative or coding projects.
- 🔄 Restore Test – Try downloading and opening a few synced files to ensure they’re not corrupted or truncated.
- 🚫 No Duplicates or Conflicts – Use tools like Rclone or OurClone to prevent duplicate files and resolve naming issues.
Method 1: Syncing Files Using the Google Drive macOS App
Keeping your files synchronized between your Mac and Google Drive ensures that your data is backed up and accessible across devices. Google Drive for desktop offers a seamless way to achieve this.
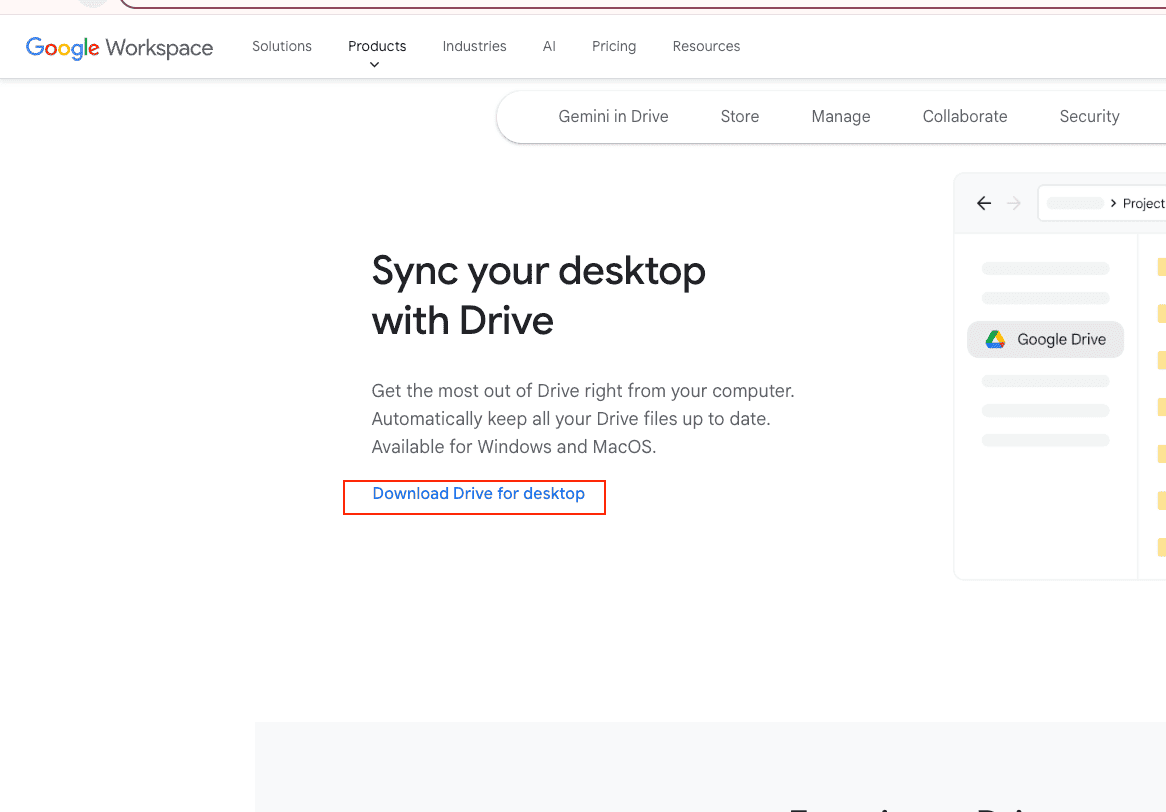
Step 1: Download and Install Google Drive for Desktop
Begin by downloading the Google Drive for desktop application:
- Navigate to https://www.google.com/drive/download/.
- Click on "Download Drive for desktop" for Mac.
- Open the downloaded
GoogleDrive.dmgfile. - Drag the Google Drive icon into your Applications folder.
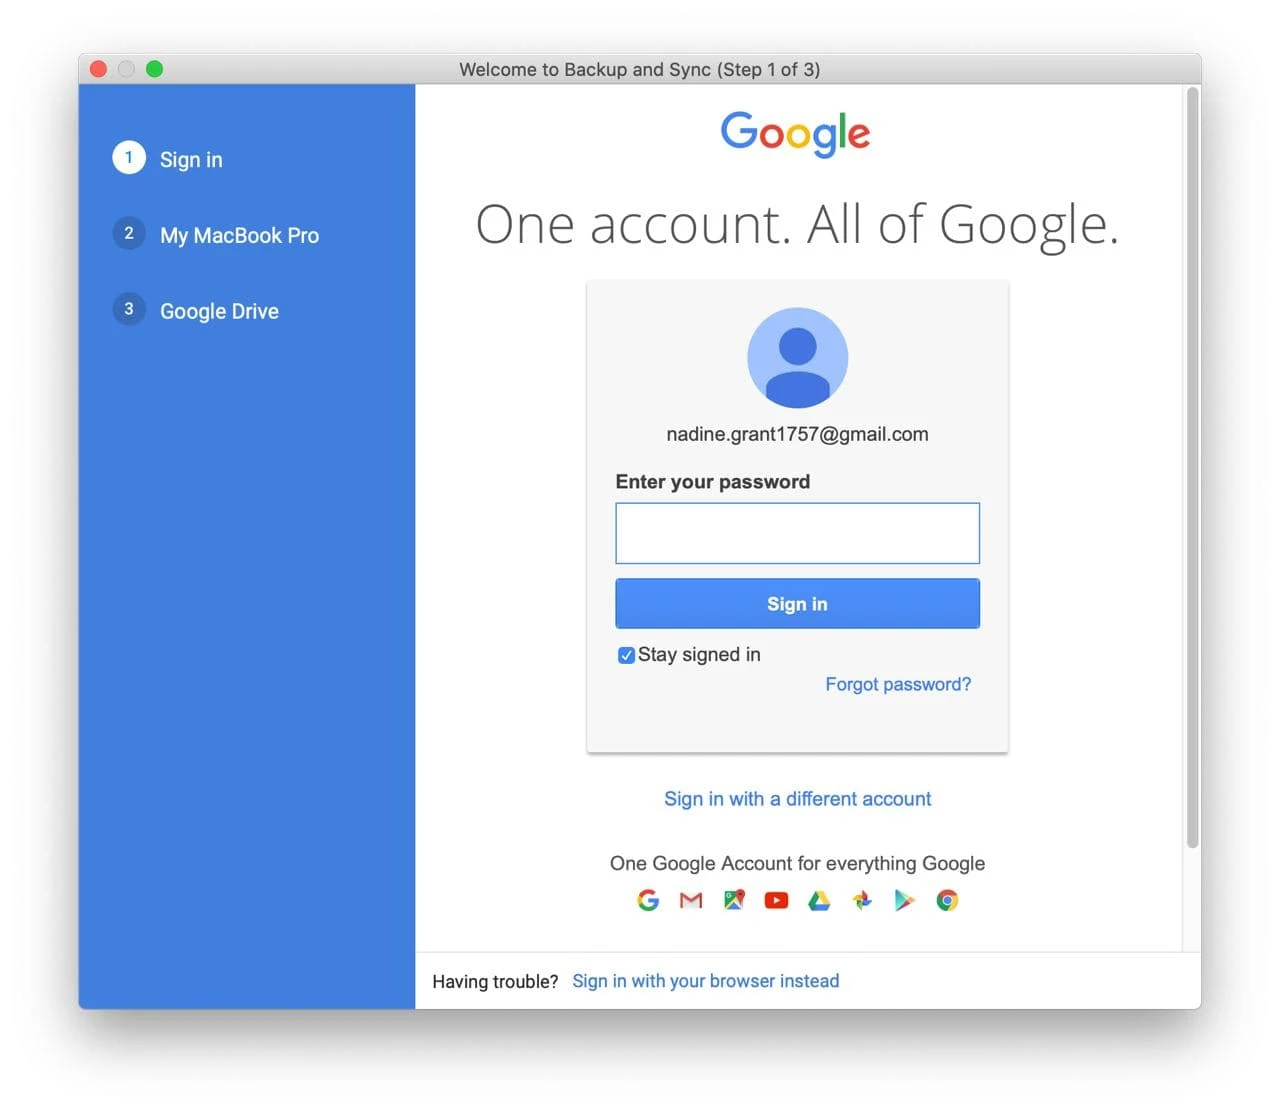
Step 2: Sign In to Your Google Account
After installation:
- Open the Google Drive application from your Applications folder.
- Click on "Sign in with browser" and follow the prompts to authenticate your Google account.
Step 3: Configure Sync Preferences
Once signed in:
- Click on the Google Drive icon in the menu bar.
- Select the gear icon and choose "Preferences".
- Under "My Mac", click "Add folder" to select the local folders you wish to sync.
- Choose whether to sync these folders to Google Drive or back them up to Google Photos.
You can also decide between two synchronization options:
- Stream files: Files are stored in the cloud and downloaded on-demand.
- Mirror files: All files are stored both in the cloud and on your computer, providing offline access.
Step 4: Accessing Synced Files
After setup:
- Open Finder and locate "Google Drive" under the "Locations" section.
- Here, you'll find your synced folders and can manage your files directly.

Additional Tips
- Ensure you have a stable internet connection during the initial sync to prevent interruptions.
- Regularly check the Google Drive menu bar icon for sync status and notifications.
- Remember that changes made to files in synced folders will reflect both on your Mac and in Google Drive.
Method 2: Sync Folders to Google Drive Using Rclone
Rclone is a flexible command-line utility that supports syncing local directories with various cloud services, including Google Drive. It's particularly useful for users who want fine-grained control over synchronization behavior or prefer scripting their backups.
Step-by-Step Instructions
Step 1: Install Rclone on macOS
Visit rclone.org/downloads and download the latest version for macOS. You can also install it via Homebrew with:
brew install rcloneStep 2: Set Up Google Drive Remote
Open Terminal and begin the configuration process:
rclone configFollow the interactive prompts:
- Choose n to create a new remote.
- Enter a name like
gdrive. - Select Google Drive as the storage provider.
- Use the default settings unless you need advanced customization.
- Rclone will open a browser window for OAuth 2.0 authorization—log in to your Google account and allow access.
Step 3: Copy Files Without Deletion
Use the copy command to upload files without removing anything already stored in Google Drive:
rclone copy ~/Documents/Reports gdrive:/Backups/ReportsThis will only add or update files in the destination folder.
Step 4: Mirror Folder Contents (Use with Caution)
If you want the destination to exactly reflect your local folder — including deletions — use the sync command:
rclone sync ~/Documents/Reports gdrive:/Backups/ReportsImportant: Files in Google Drive that do not exist locally will be deleted. Use only if you're sure the local folder is the authoritative source.
Pros
- ✅ Customizable sync options including filters and date checks
- ✅ Ideal for automation via shell scripts or scheduled tasks
- ✅ Works without keeping a constantly running background process
Cons
- ❌ Requires familiarity with the terminal
- ❌ Incorrect use of
synccan lead to data loss - ❌ No graphical interface for monitoring sync status
Method 3: Sync macOS Folders to Google Drive with OurClone
OurClone is a desktop sync application designed for macOS users who want reliable, automated transfers between local folders and cloud platforms. It supports services like Google Drive, OneDrive, Dropbox, and many more—all in one place.
Why Use OurClone for Google Drive Sync?
🔐 OAuth 2.0 Authorization for Google Drive
OurClone uses Google’s official OAuth 2.0 login flow to authorize access to your Drive without needing your password. This ensures safe, secure cloud integration.
💡 Easy Setup with Custom Drive Naming
When adding a new Google Drive connection, OurClone lets you assign a unique name to each Drive—making it easier to organize multiple accounts or separate work and personal files.
📁 Full Control Over Sync Logic
Whether you want to back up specific folders, migrate your project archive, or mirror a working directory, OurClone provides flexible sync modes to meet your needs.
How to Set Up Google Drive Sync with OurClone
Step 1: Download OurClone
Head to ourclone.app and download the latest version for macOS. Install and launch the app.
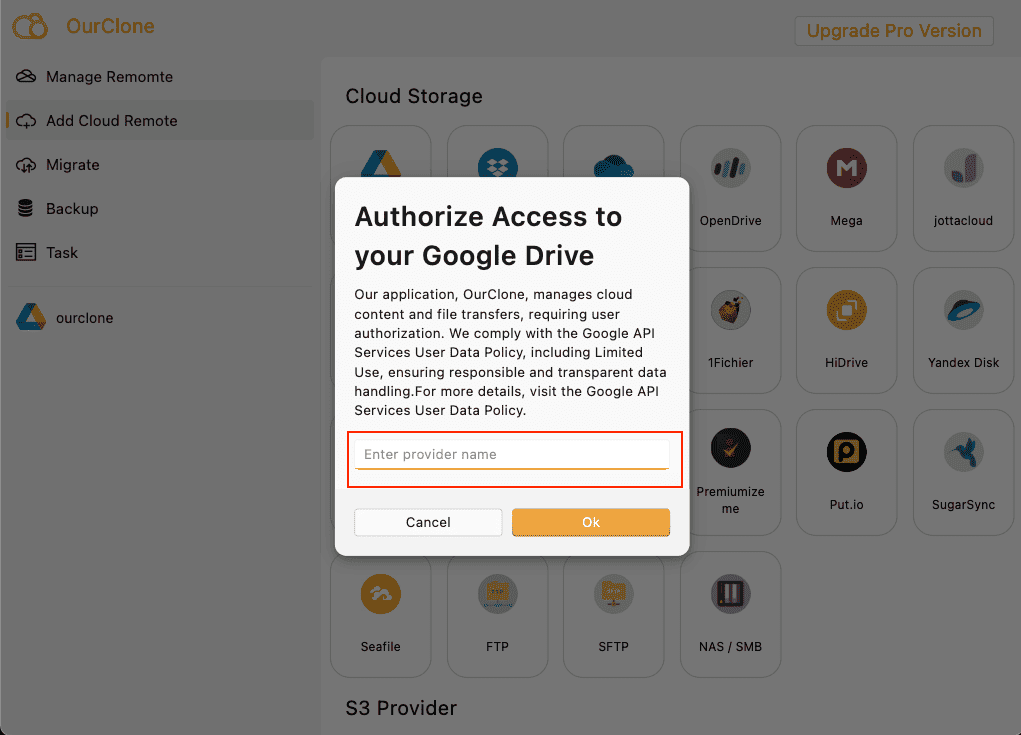
Step 2: Add Google Drive Account
Click on Add Cloud Remote. Select Google Drive from the provider list In the dialog that opens:
- Type a name for your Drive connection (e.g.,
work-driveorjohn.personal). - OurClone will automatically open your default browser and redirect you to Google’s OAuth page.
- Log in with your Google credentials and approve the permission request.
Once authorization is complete, the Google Drive account is linked and ready to use—no API key or manual token setup required.
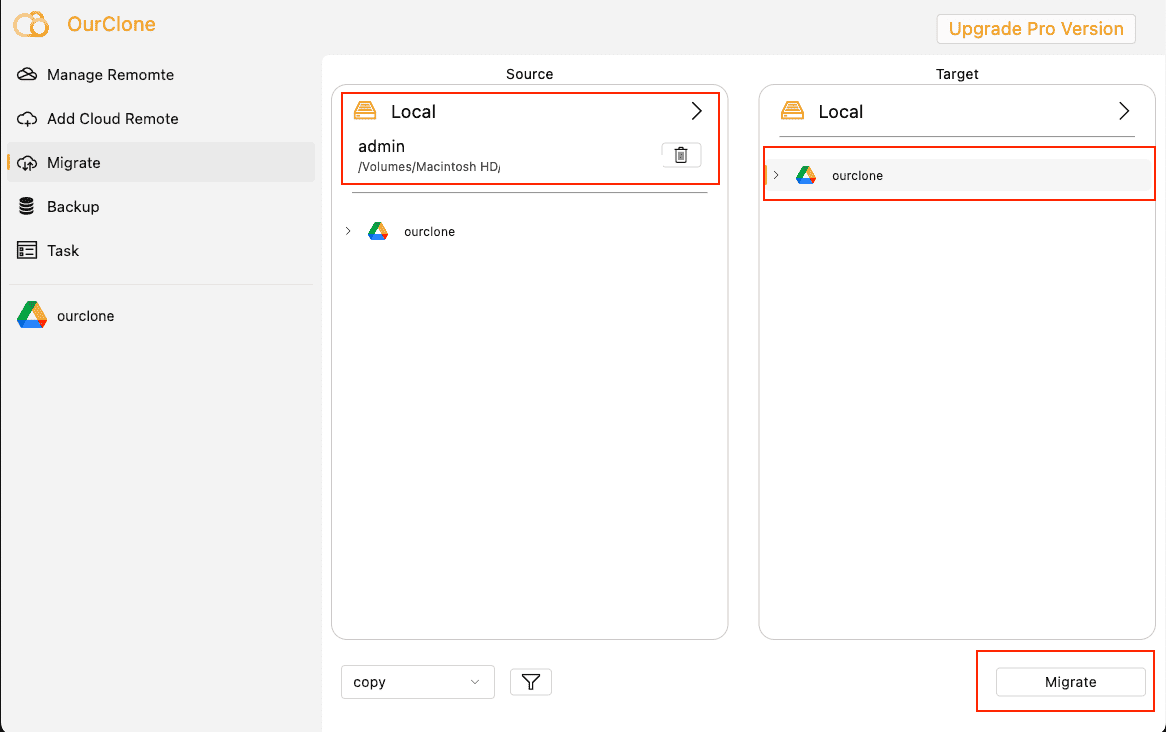
Step 3: Choose Your Sync Source and Target
Select a local folder on your Mac as the source, and then pick a destination folder on your connected Google Drive. You can sync to the root, a specific folder, or a subpath within another cloud provider.
Step 4: Select Sync Mode
- 📂 Copy – Safely copies files from your Mac to Drive without touching existing files.
- ✂️ Move – Copies the files, then removes them from your Mac. Useful for freeing space after backup.
- 🔄 Sync – Keeps both sides identical. Any extra files in the destination will be deleted.
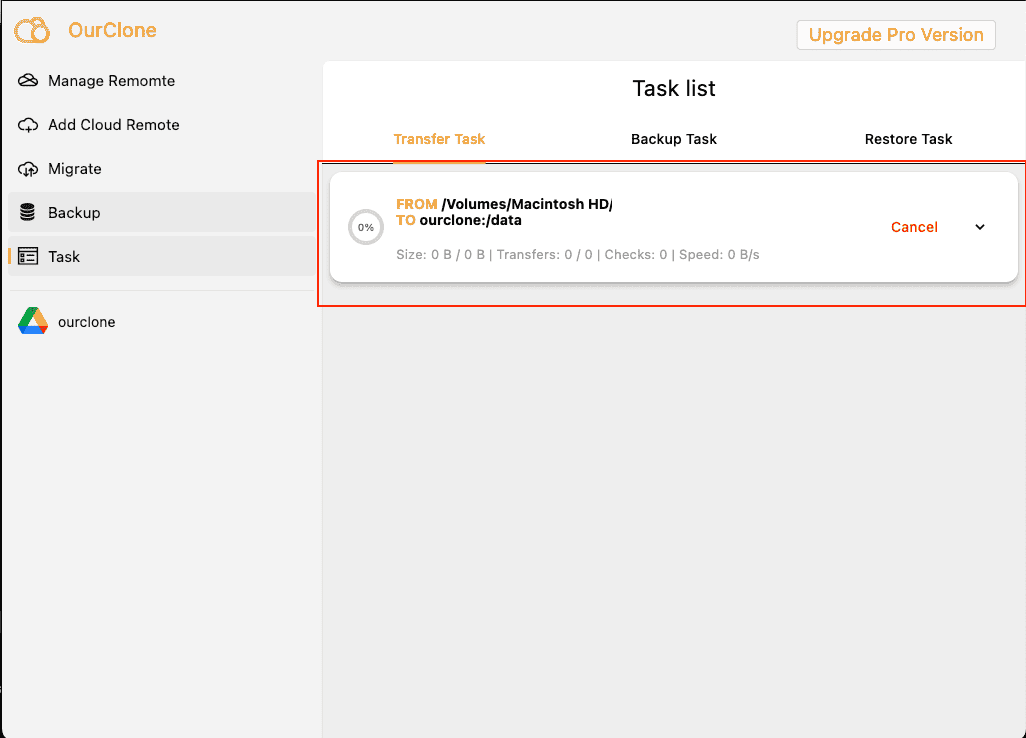
Step 5: Start and Monitor the Task
Once your sync task is configured, click Migrate to begin. You can view real-time progress and history in the Task section. Status indicators will let you know when everything is complete.
Comparison Table
| Feature | Google Drive Desktop App | Rclone | OurClone |
|---|---|---|---|
| Automation | Yes (background sync) | Yes (requires scripting) | Yes (with task scheduler) |
| Sync Modes | Stream / Mirror | Copy / Sync / Move | Copy / Sync / Move |
| Incremental Transfer | Yes | Yes (by default) | Yes |
| Encryption | Google-managed encryption | Optional (via flags or backend settings) | Built-in secure channels |
| Cloud Provider Support | Google Drive only | Supports 60+ services | Supports 60+ services |
| Ease of Use | Simple (native UI) | Requires CLI experience | User-friendly interface |
| File Mirroring | Yes (with Mirror mode) | Yes (via sync) |
Yes (via Sync mode) |
| Restore Capability | Yes (Drive version history) | Manual re-sync | GUI-based task log and rollback |
| Authorization | Google account login | OAuth via browser flow | OAuth 2.0 with custom naming |
| Ideal For | General users needing continuous sync | Power users and script-based automation | Anyone seeking flexible sync with no scripting |
Post-Sync Verification Steps
1. Verifying with Google Drive for Desktop
After syncing your folders using the official Google Drive app, you can verify the results directly in Finder:
- Open Finder and navigate to Google Drive under the “Locations” section.
- Check whether all intended files and folders are present in the synced path.
- Confirm that recent changes (e.g. renamed, edited, or deleted files) are reflected both locally and on drive.google.com.
- Optionally, log into Google Drive Web and browse the target folder for final confirmation.
For time-sensitive or versioned content, you can also right-click a file and select Version History on the web interface to confirm synchronization accuracy.
2. Verifying with Rclone
Rclone includes verification commands that compare local files against what was uploaded to Google Drive:
rclone check /path/to/local gdrive:/remote/folderThis command compares hashes and file sizes to detect mismatches or missing files.
You can log differences with flags like:
rclone check /local/path gdrive:/remote/path --differ --missing-on-src --missing-on-dst --log-file=sync-check.logThis method is ideal when accuracy is critical or when syncing large directory trees.
3. Verifying with OurClone
OurClone offers a streamlined post-sync experience through its visual task dashboard:
- Open the Task tab to view completed jobs and sync summaries.
- Click into any task to see a full breakdown of synced files, skipped items, and warnings.
- Use the built-in log viewer to double-check file paths and detect any issues that may need review.
Since OurClone integrates with Google Drive using OAuth and remote browsing, you can also preview destination contents directly from within the app.