Why Backing Up Your macOS Folders to Storj Is a Smart Move
If you want offsite Mac backup with more flexibility than a consumer sync folder, Storj is worth a serious look. It combines S3-compatible object storage with a distributed architecture, while OurClone adds local encryption, snapshot history, and a backup workflow that feels much easier to manage from macOS.
- 🔐 Privacy and Encryption Layers -- Storj is built around encrypted object storage, and OurClone adds its own repository encryption before upload. That means your backup data is protected both by the storage platform and by your own backup password.
- 💸 Backup-Friendly Pricing Options -- Storj pricing varies by tier. On its pricing page, the Archive tier is listed at $6 per TB per month with $0.02 per GB egress, while the Global tier is listed at $15 per TB with egress included, giving you room to choose based on restore frequency.
- 💻 S3 Compatibility on macOS -- Because Storj provides S3-compatible credentials and endpoint-based access, OurClone can treat it as a practical cloud backup target for your Mac without forcing everything through a Finder sync client.
- 📦 Flexible Repository Design -- You can keep one Storj repository for work files, another for photos, and another for external-drive archives. That separation can make restores cleaner and retention decisions easier later.
- 🌍 Cross-Device Recovery -- Storj is designed for durable object storage and global access. If you need to recover on another Mac, you can reconnect the repository in OurClone and restore the files you need from your backup history.
What Is Incremental Backup and Why Does It Matter?
A full backup every single time sounds safe, but it quickly becomes inefficient. Large project folders, photo libraries, and video archives take too long to re-upload if only a small part changed since the last run.
Incremental backup fixes that by transferring only new or changed data after the first snapshot. Instead of repeatedly pushing the same files to Storj, you only send what actually changed, which saves both time and bandwidth.
OurClone supports incremental backups to Storj, so the first upload lays the foundation and later runs stay much lighter. That makes Storj a practical destination for recurring Mac backups rather than just a bucket that fills up with repetitive full copies.
- 🚀 Speeds up backup times by only syncing changed files
- 💾 Saves cloud storage space and bandwidth usage
- 🔐 Works with encrypted storage like Storj for secure updates
- 📅 Allows versioning so you can access past edits when needed
What to Know Before You Start Backing Up
A little planning up front makes your Storj backup easier to run and much easier to restore later.
- 📁 Pick the Right Folders -- Focus on folders with real recovery value, such as
~/Documents,~/Pictures, code projects, and client archives. Skip macOS system files, caches, and temporary folders that do not belong in cloud backup. - 📶 Make Sure Your Internet Can Handle It -- Your first upload to Storj will usually be the heaviest one. A stable connection matters much more on the initial snapshot than on the smaller incremental runs that follow.
- 🔒 Don't Forget Security -- Create dedicated Storj S3 credentials for backup access, keep your encryption password stored safely, and avoid giving the credential broader bucket access than the backup really needs.
- 🧪 Start Small -- Test one smaller folder first so you can confirm the Storj endpoint, bucket path, credential scope, and restore workflow before you commit a larger archive.
- 📦 Know Your Backup Strategy -- The first backup is a full snapshot, while later ones are incremental. That combination keeps recurring Storj backups much more manageable over time.
How to Back Up macOS Folders to Storj Using OurClone
OurClone keeps the setup approachable. Storj uses S3-compatible credentials, so you'll create an access key, secret key, and endpoint in Storj first, then connect that storage backend inside the app.
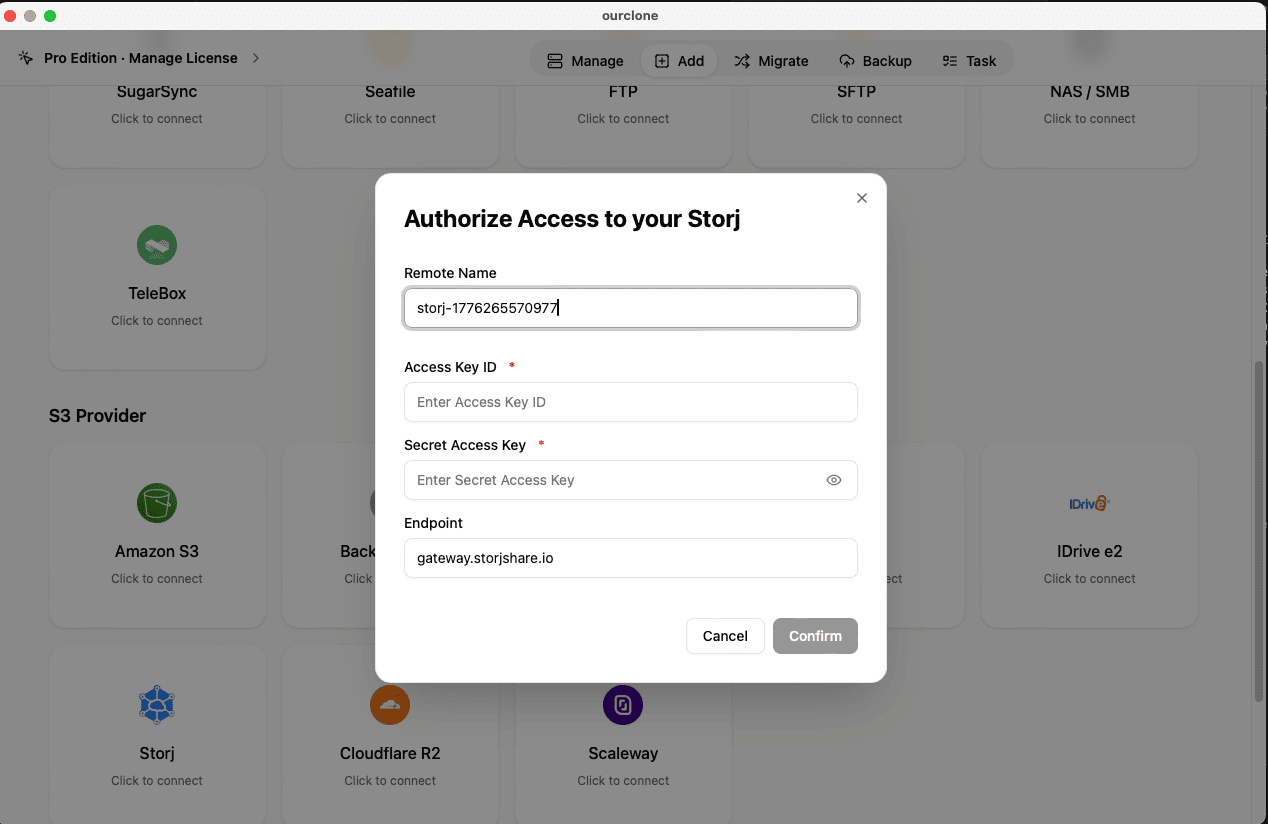
- 🔐 Connect to Storj via Access Keys -- Open OurClone and go to
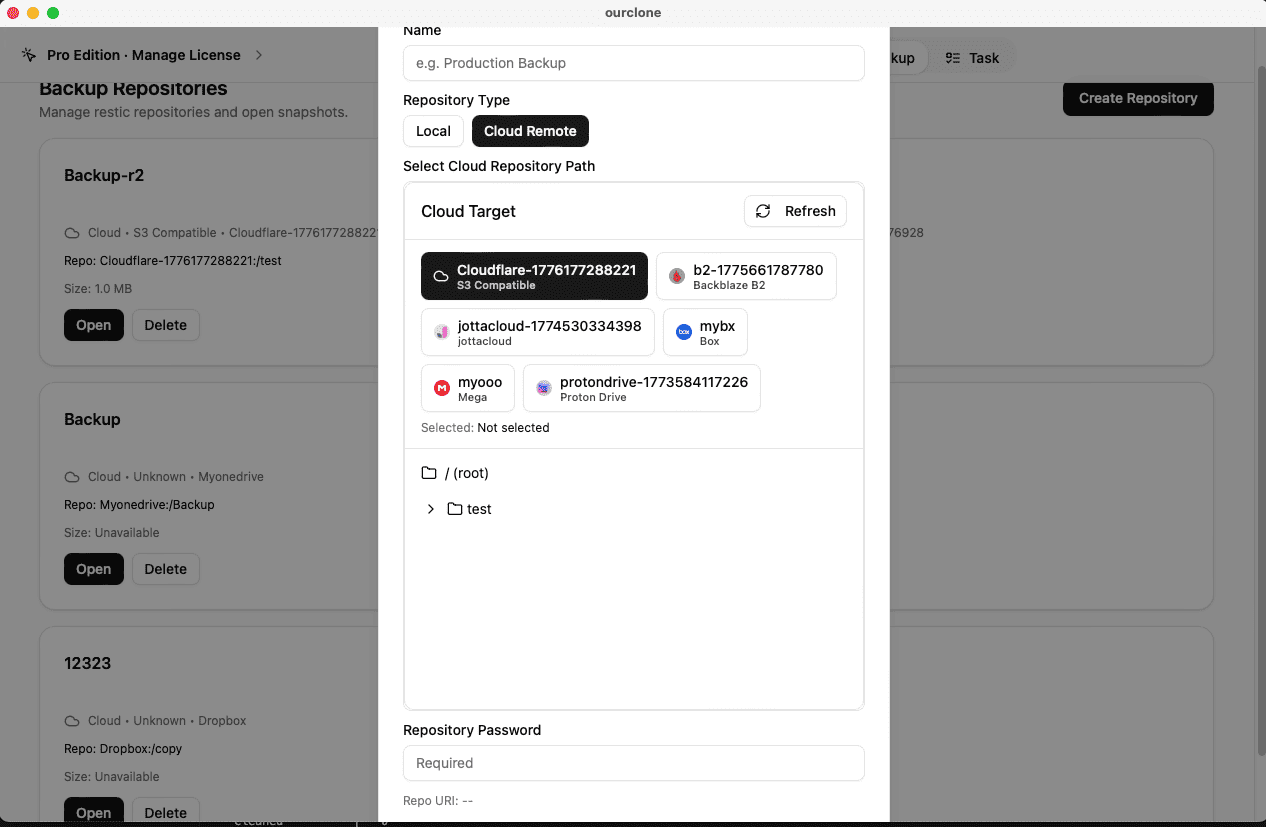
Add Storage. Select Storj. You'll need your Access Key ID, Secret Access Key, and the Storj S3 endpoint, which you can create in the Storj console and docs. In most setups the endpoint isgateway.storjshare.io. Once entered, OurClone will verify your credentials and Storj will appear as a connected storage backend. - 🗄️ Create a Backup Repository -- Go to the
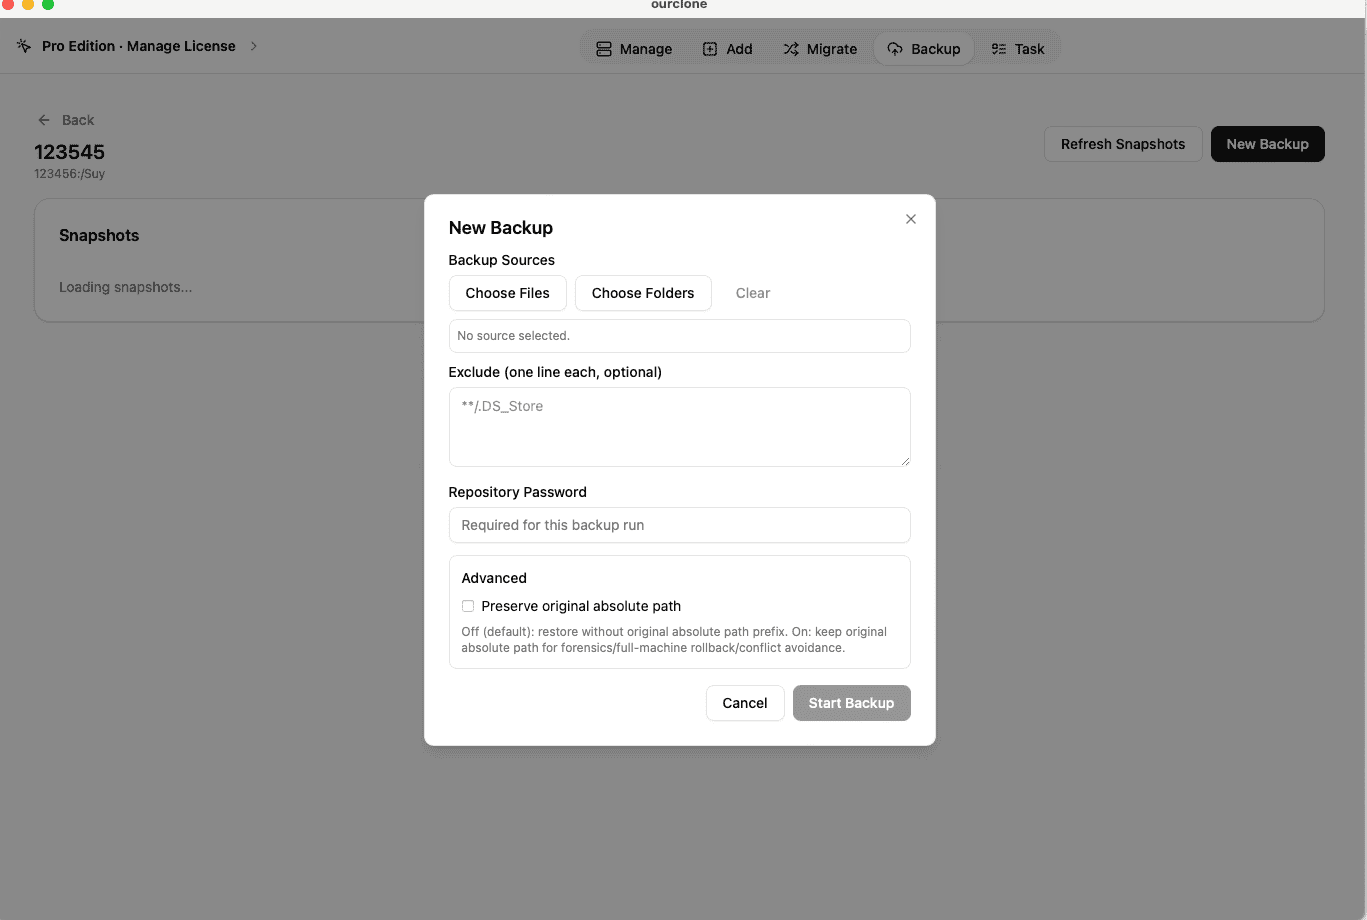
Backuptab and clickCreate Repository. Choose a destination path on Storj like/macos-backup. Set a repository name and define your encryption password. This password is required to restore your files -- keep it safe. - 📁 Select Folders to Back Up -- Once your repository is ready, click
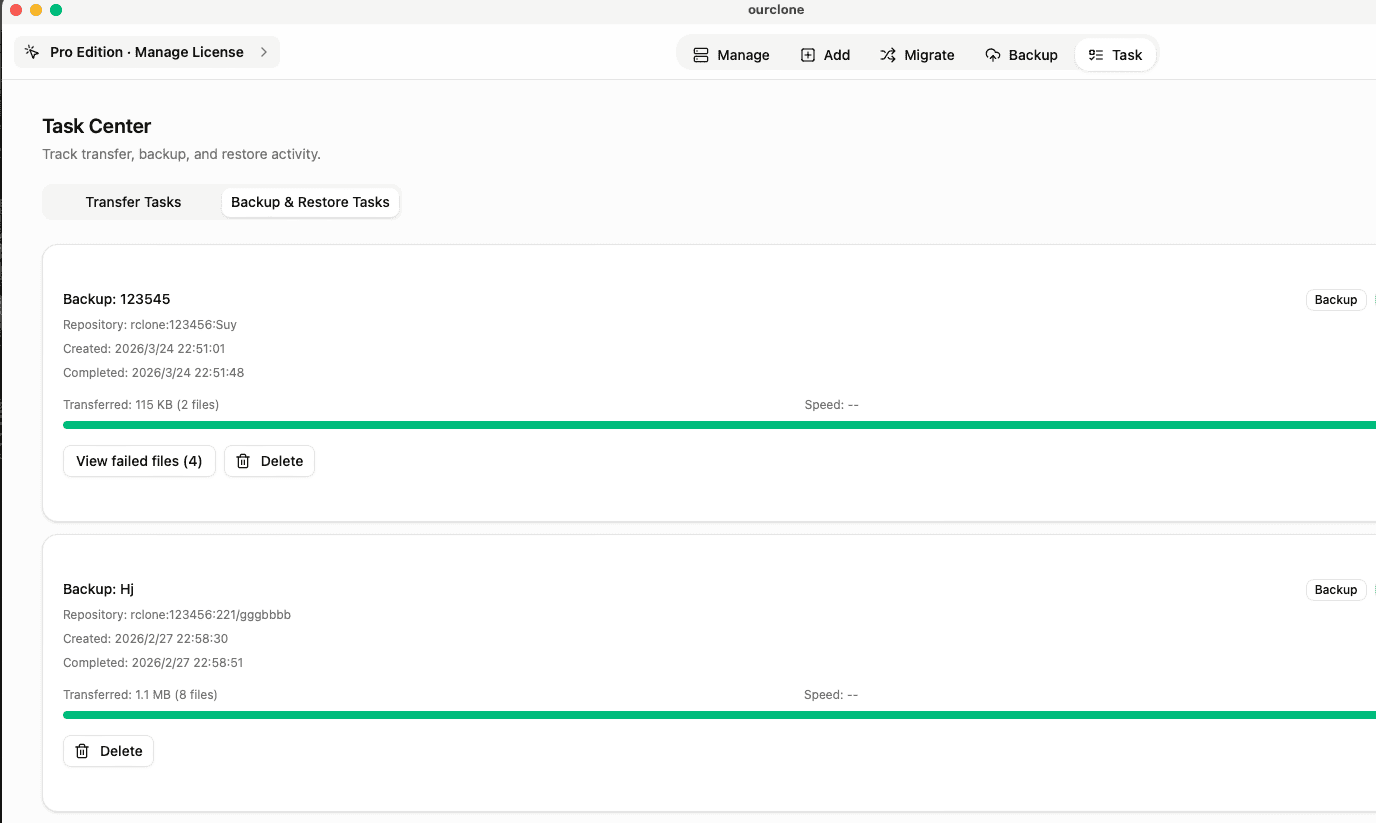
New Backupand select the local folders you want to protect. Whether it's~/Documents,~/Pictures, or folders on an external disk, OurClone will encrypt and send them securely to Storj. - 📊 Track Backup Progress in Real Time -- Head over to the
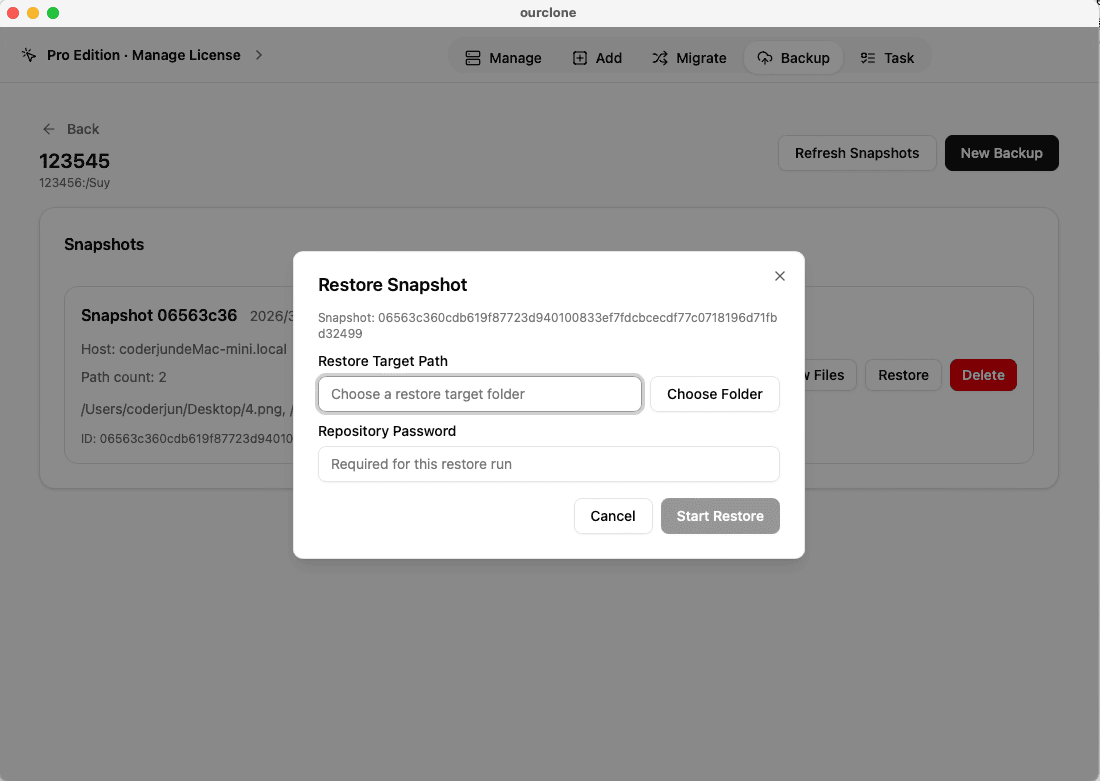
Tasktab to monitor your upload status. OurClone breaks files into blocks and uploads them efficiently -- even large backups can be paused and resumed without losing progress. - 🔄 Restore When Needed -- To recover data, open your repository, select a backup version, and click
Restore. After entering your encryption password, you can restore files to their original location or a new folder -- your directory structure stays intact.
Storj gives you flexible S3-compatible object storage, and OurClone turns it into a practical Mac backup workflow with encryption, incremental snapshots, and simple restores. The result is an offsite backup setup that stays efficient after the first upload instead of becoming a maintenance headache.
How to Confirm Your Backup in OurClone
Once the job finishes, take a minute to verify it. A quick check makes sure your Storj backup is actually usable and not just a task that looked successful at first glance.
- 📄 Check Task Completion -- Go to the
Tasksection and review the latest backup task. If it completed cleanly, you're in good shape. If files failed to upload, OurClone will show that clearly. - 🧩 Review Skipped Items -- Locked files, permission errors, or changed source paths can cause partial results. The task details help you catch those issues quickly instead of discovering them during a restore.
- 📜 Use the Detailed Logs -- Open the backup task log to review file paths, sizes, and upload behavior. That gives you a simple way to confirm that the folders you expected were actually included.
- 🔐 Protect the Recovery Path -- Verification is not only about whether Storj accepted the upload. It is also about making sure you still know the correct repository password, because that is what unlocks your encrypted backup later.
Regularly Check That Backups Are Still Running
Scheduled backups should not be left completely unattended. Credential changes, bucket permission changes, or endpoint mistakes can interrupt future Storj uploads even when the existing repository still looks fine.
Test a Restore Before It Becomes Urgent
Restore one smaller folder to a temporary location and open a few files. That confirms your Storj connection, your repository password, and the integrity of your backup snapshots before a real recovery is on the line.