1. Install OurClone
Download the installer for Windows, macOS, or Linux. The setup is quick and feels very similar to installing any desktop sync client, so you’ll be ready to go in just a couple of minutes.
2. Connect Your Mega Account
Launch OurClone and click Add Cloud. Select Mega from the list of supported services. You’ll be asked to provide your Mega email and password (this is handled securely within OurClone). Once authenticated, your Mega folders will appear inside the application, ready to be used as a source.

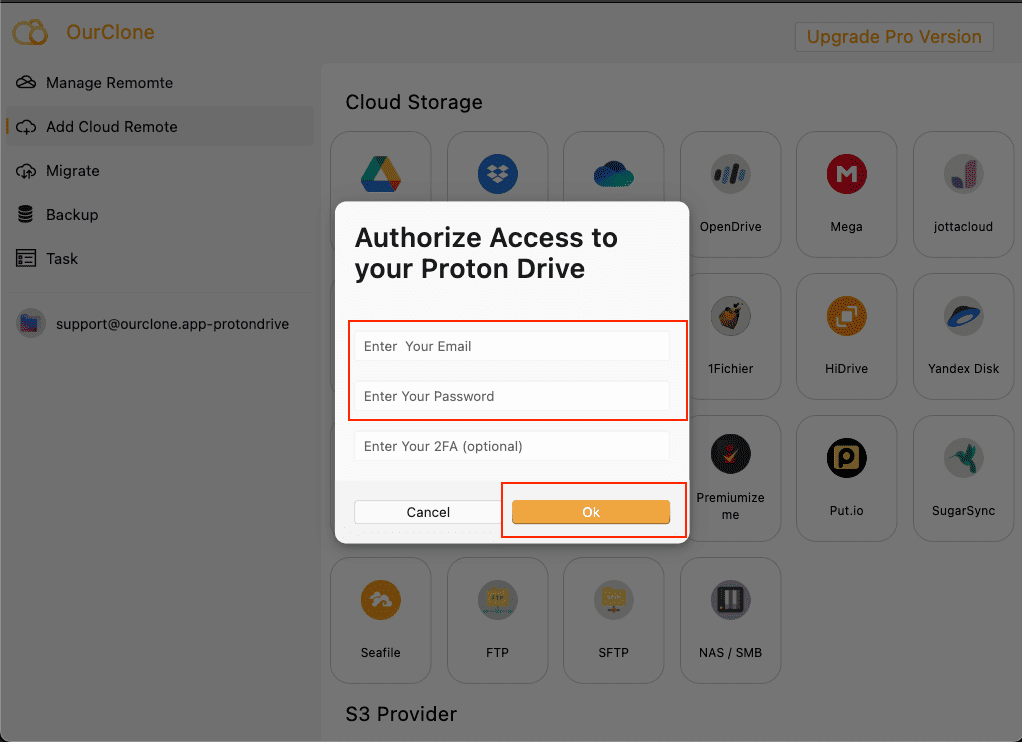
3. Add Proton Drive (Email + Password)
Proton Drive works differently than token-based services. When you choose Proton Drive in the Add Cloud screen, you’ll need to enter your Proton account email and password. If you have two-factor authentication enabled (2FA), the app will also ask for the verification code from your authenticator or Proton account. This extra step ensures that your Proton Drive connection remains protected by Proton’s strict security model.
- Go to your Proton Drive account
- Enter your Proton email address and password
- If prompted, input your 2FA code to complete the login
4. Configure the Transfer
With both accounts connected, head over to the Migrate tab. Set Mega as your source and Proton Drive as the target. Then select how you want the transfer to behave:
-
Copy→ Keeps your Mega files intact and duplicates them in Proton Drive -
Sync→ Mirrors updates both ways, keeping Mega and Proton Drive aligned -
Move→ Transfers files into Proton Drive and removes them from Mega
Once your settings are ready, hit Start. You’ll be able to watch progress in real time as the migration runs.

5. Monitor Tasks and Progress
After the job begins, go to the Task view in the sidebar. This panel shows current transfer speed, percentage complete, and any errors. If something interrupts the connection — like a brief network issue — you can retry or resume without losing progress.